How to use the SEGGER J-Flash software to download files for programing a target board
This is an introduction about how to use the SEGGER J-Flash software to download files for programing a target board.
Requirements:
Windows O.S: Windows 7
Hardware Debugger Driver: J-Link-OB
Software: J-Flash ARM V4.68
Debugger Driver Connection Method: SWD
Target Board: STM32F103C8T6 Minimum System Board(ST)
Power Supply: J-Link-OB
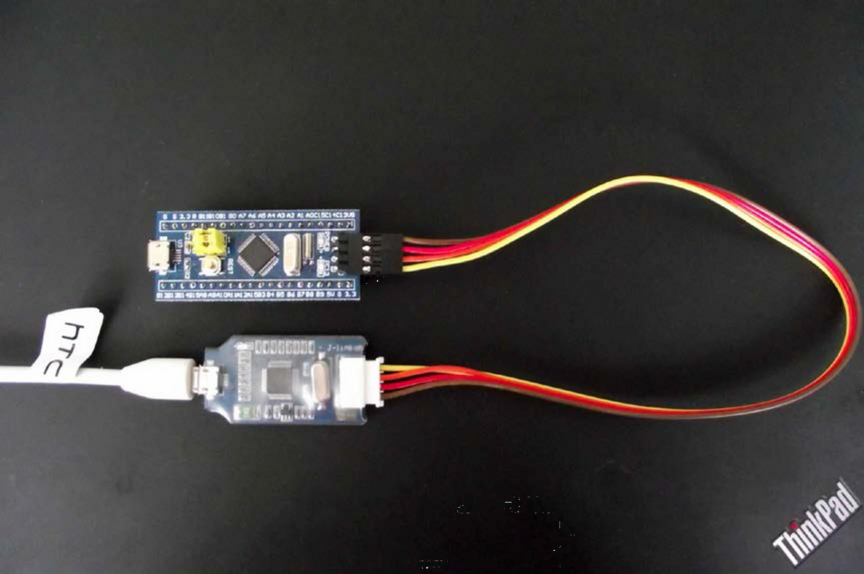
STM32F103C8T6 Minimum System Board (ST) Download:
- Before downloading, please confirm if the J-Flash ARM and J-Link driver are already installed, and also check if the J-Link debugger driver is well connected with the target board.
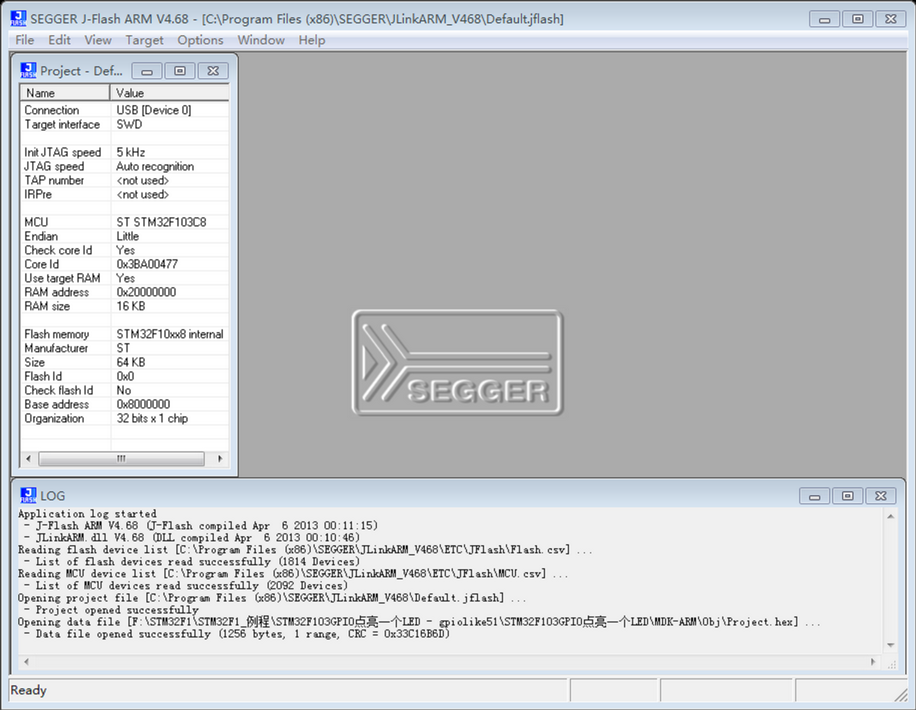
- Start the J-Flash ARM V4.68 software.
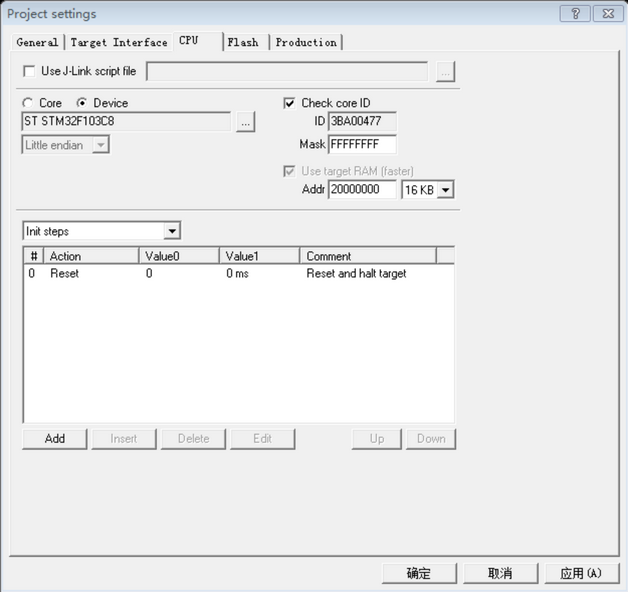
I - Settings
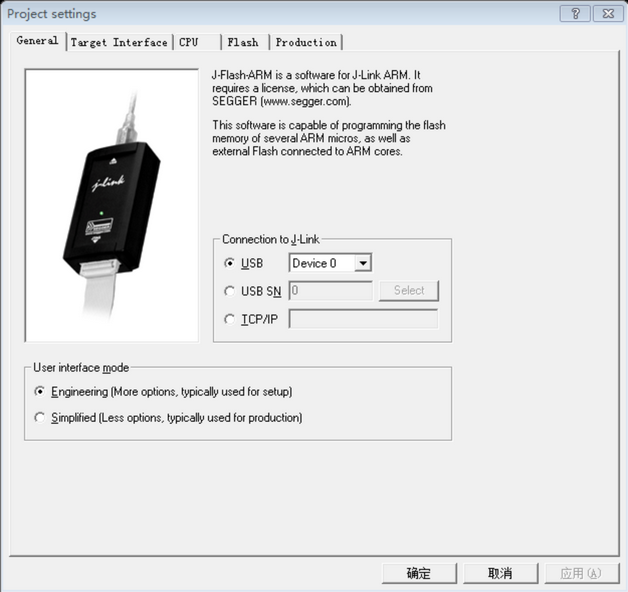
Click on “Options” and then “Project Settings” (or press Alt + F7 for shortcut) to enter settings interface.
- J-Link Setting: select the default settings (USB - Device 0).
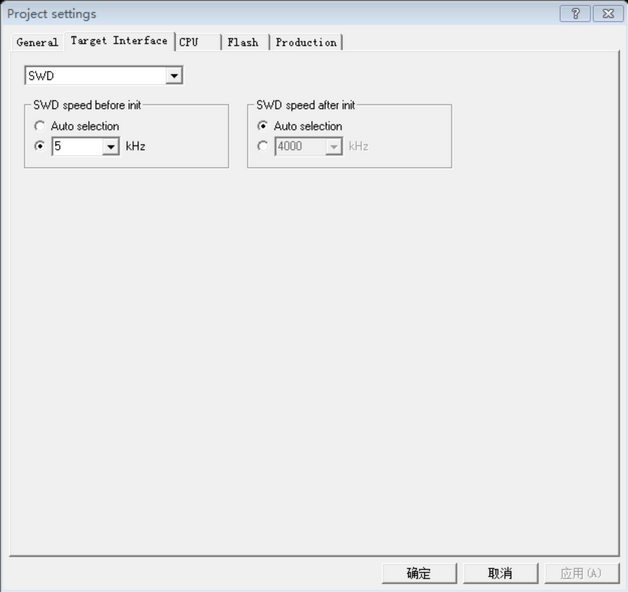
- Target Connection Type & Speed setting: jump to “Target Interface” and set both “SWD speed before init” and “SWD speed after init” to “Auto selection”.
- Click on “CPU” button and select “ST STM32F103C8” among the drop-down list as the “Device” version. And then click on “Apply” and “Confirm”.
II - J-Link & Target Board Connection
Click on “Target” menu and then the “Connect” button, “Emulation Selection” interface will appear and click on “OK” to connect the J-Link and target board.
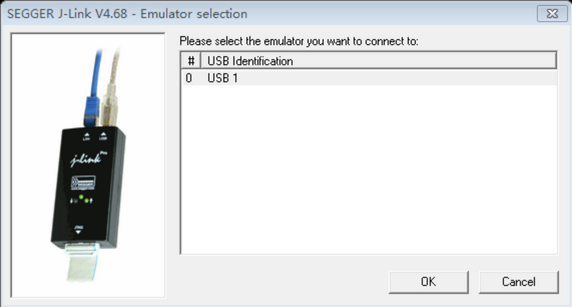
If they’re well connected, you can see updated LOG information at the bottom of the software.
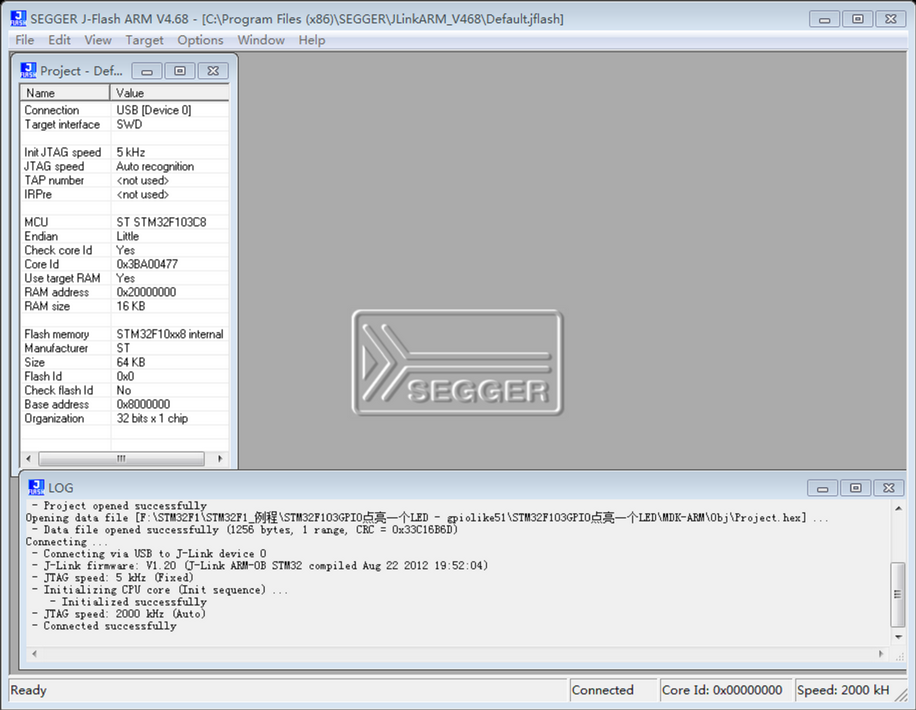
III - Download Hex File
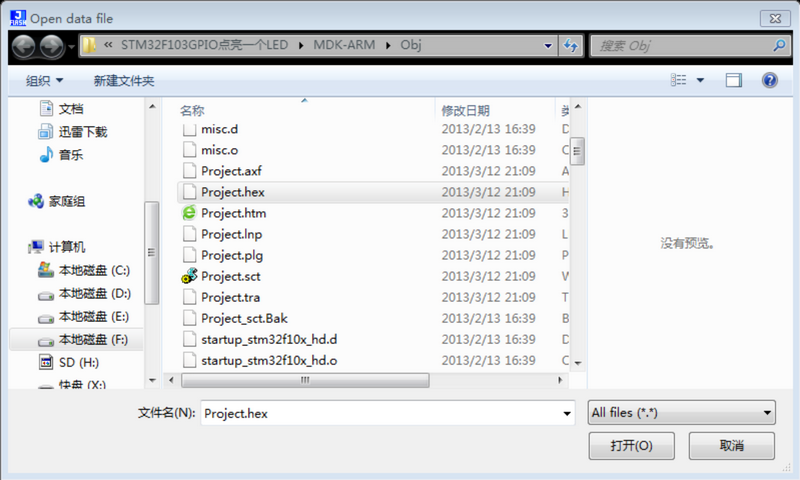
Click on “File” at the main menu, and then click on “Open data file” and select the needed “hex” file to open for flashing the target board.
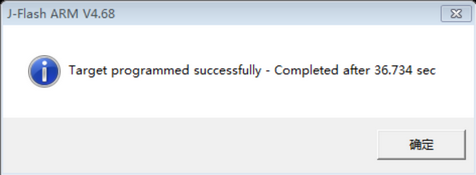
Programing “hex” file: click on “Target” and then select “Program” (or Program&Verify or Auto) to program the file into the target board.

Note: click on “Y” to confirm to erase the affected area, or the programing fails with informed message as above picture.
PS:
If you have any questions, please feel free to leave a comment.
For more information please go to Anet Community: https://forum.anet3d.com/
J-Link is available in our store, just go to the homepage and search for it.
Leave a comment