How to Solve Cooling Fan Problems on Anet 3D Printer
Some users tend to misjudge the cause of improper fan condition on the print head when printing with Anet 3D printer and accuse the cooling fan (air blower) not working. How can we correctly know the problem and solve it accordingly. Let’s proceed to below paragraphs.
Operation Principles of Print Head Fans
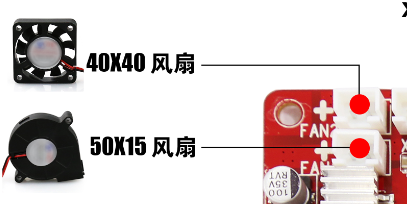
There are two fans on the print head of Anet 3D printers. The cooling fan (air blower) is connected to FAN1 connector and the 4010 fan is connected to FAN2 connector on the mainboard.

According to the default setting, the cooling fan won’t operate when the 3D printer is powered on. It operates only when you give commands through the control panel, which is more commonly known as the LCD display.
The 4010 fan will immediately run when the 3D printer is powered on.
The cooling fan doesn’t run first but the 4010 fan operates. Thus, some users think there is something wrong with the cooling fan.
Ways to detect cooling fan problems on Anet 3D printer
How to detect if the cooling fan is working improperly on your Anet 3D printer? There are two ways we can try.
Method 1
Connect the cooling fan to FAN2 connector and power on the printer. If the fan operates immediately, then it is ok; if not, replace the fan with a new one.
Method 2
Input fan speed commands through the control panel, which is the LCD screen on your Anet 3D printers.
On a 2004 LCD screen of an A6 3D printer, please click on the main menu and then select “Fan speed” and “Set Fan Full”.
On a12864 LCD screen commonly seen on an A8 3D printer, please click on the main menu and then select “Fan Speed”.
Input the fan speed to above 0, and the cooling fan will operate; if not, replace it with a new one.

Leave a comment