Post-processing My 3D Printed Mandalorian Helmet
This 3D printed Mandalorian Helmet has been one of the longest projects I have done other than RC airplanes but I have certainly enjoyed it quite a bit. There are different ways and means to perform a post-processing for your 3d prints. In this article I show you the easiest and fastest way to do it, especially with materials and paints that you can find in any paint store or in any super or hardware store.
Download Mandalorian Helmet File
The file that I used for this Mandalorian helmet was updated and now one more attached to the original helmet of the series is available,
Free download link of Mandalorian Helmet:
(https://www.thingiverse.com/thing:3578797)
Designer: TheBrokenNerd83
Choose Filament and 3D Printer
I printed the helmet with the black filament that came included with my Anet ET5 Pro, but it doesn't really matter which filament you use as it will be painted anyway.
Although perhaps if you are looking for a smoother finish, silk filament could be a good option.
One tip that I can give you with this type of piece is that if you are going to use it continuously or as for cosplay, give it a layer of polyurethane or epoxy resin to make it more resistant, but if you are going to use it as a display piece that It is not necessary.
Post-processing First Step: Sand
The first thing we should do in the post-processing is sand. I recommend you start with a coarse sandpaper of 60 or 80 grit to hide all imperfections, here I am using an 80-grit sandpaper for wood, then use a fine-grain sandpaper.
Like for example 240 or up to 400 grit, you have to sand your entire piece well. It is a heavy and tiring process but believe me this makes a difference.

Sand on all sides and run your hand constantly over the piece to make sure it is even and smooth. 
Highheat099 shared his post processing Mandalorian helmet result on Reddit. He started with a 120 grit sand, followed by 220, 400, and 600. Hit it with a filler/primer spray, did a wet sand at 800 and 1000 grit. Put a few layers of black Laquor spray, and then rubbed in graphite powder.
Sealer to Hide Print Lines
The time has come to use a sealer to try to hide the gaps or very visible lines, for this I use wood sealer which is very cheap.
You can use any other sealer or automotive paste that you want that will depend on the budget and the time you want to spend on your project.

You are going to apply the sealer in the parts where the piece needs it most, where you see holes, or very pronounced lines and you can even apply it to the entire piece, this sealer is like a paste but you can apply water if you feel that it is too solid. With your hand or with a spatula you will apply it in all the parts where you see gaps or spaces between the layers and also to hide some scratches from the sandpaper.
Sand Again on Paste Remains
I applied it only in the parts where I thought it was needed and in the lateral parts of the helmet since the shape of this piece is very fragile and with this I make sure that it was somewhat more reinforced, once applied we will wait for a couple hours to air dry.

And now go on, sand and sand again !!
I'm sorry if you thought it was time to paint, well, don't worry, we just have to make sure that the piece is as smooth as possible, make sure to sand all the patching and any cracks or holes where excess paste remains.
Sand well with the fine sandpaper and go over your hands again to ensure the result, this step is very up to everyone's choice since if you spend more time on this step or use an orbital sander, you could improve the appearance of your piece incredibly.
Remember to do all this in a ventilated area or wear a mask so you don't breathe in all the sanded particles.
Clean Dust and Remains
Once you have properly sanded your piece, try to clean it and remove the dust or excesses that have remained with a cloth and water or you can use a little alcohol. This will ensure that when painting there is no dust or something that can ruin your painting.
Use Primer or Filer to Fill Small Gaps
And now yes! It's time to paint our piece! The first thing we have to use is a Primer or Filler to fill in all the small gaps that may be in our piece, here I am using a primer from a Mexican brand which has a cost of $ 60 pesos something like 3 or 4 dollars, but You can also use a very good one called duplicolor and you can find it in stores such as autozone or the rustoleum brand although they are already more expensive products, remember that here I am showing you how to do it in an economical way and with products that you can find almost anywhere.
Spray Coats
We are going to apply a couple of coats with the spray making a side to side movement with the can so that the paint reaches evenly and does not create an excess in only one part of the piece.

Try to cover all the areas as best as possible by spraying from one side to the other and try to make the movements following the lines or curves of your piece.
Once your entire piece is ready and covered, you must wait a few hours for it to dry the paint and you can sand again the imperfections that you have noticed, for this we are going to take our fine sandpaper again and we are going to wet it with a little water and we will sand all the parts to again leave a piece as smooth as possible.

Take advantage of, and sand all the imperfections that you find before giving the other pass of primer. You will notice that your piece is increasingly smooth and the lines of the printing are disappearing.
Ok, once sanded we are going to repeat the first step will go from side to side with the spray, we will cover the entire piece again and wait for the paint to dry again for a couple of hours, I know it is a tedious process but with this you will ensure that it has the best finish.

Well, a few hours have passed and we can sand a little just to make sure the next layers of paint adhere, this time I will apply a metallic black paint.
I really liked this paint as it gives it a metallic and shiny touch and you can even notice the small metal particles in the paint, in fact I thought about leaving it this color but no, I had to stick as closely as possible to the original helmet. We spray equally from side to side and trying to follow the lines and curves of the piece. As many times as necessary without staying in one place as the paint could run off and ruin the piece.

I applied this color since the original helmet has metallic black tones according to the reflection and with this technique I try to simulate that, this base can be applied only once and then we are going to apply the final color, we must wait about 4 or 6 hours to Let the paint dry completely and we can apply the last layers.

Well after waiting a few hours we are going to apply the last layers, for this part I bought the chrome color of the same Mexican brand, it does not give a shine as chrome itself, but it was the closest thing I found, what we are going to do now is to apply from one side to the other regulating the flow of the paint without pressing too much so that it does not come out as much and can create the effect of the reflection that I was commenting on.

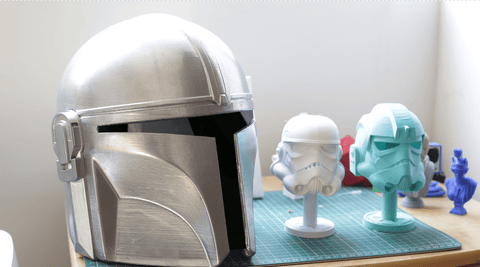
Here you can already notice all the sanding work that we did before, the brightness and reflections in the curved parts of the helmet, it is true that there are parts where you can still see some lines and imperfections but that can be improved if we spend more time to sanding and to the patching part, but so far I am very satisfied with the result and bear in mind that we do not spend much on the materials. Once the chrome or silver color dries, what I do is very gently spray a little of the metallic black color so that the chrome color is not so even and it has those black reflections of the original helmet.

Now it was time to apply the visor, for this I bought acetates and adhesive film to polarize glasses which I acquired through amazon, we are going to generate a template either with a paper or with a cardboard and with this we can cut the shape of the visor, we are going to apply hot silicone around it so that it is well adhered, you can also use double-sided tape if you prefer or you can even use epoxy plasticine to join it.
Once you have all this you can add some sponges to the inside of the helmet to make it more comfortable to use, although if it is for display it is not necessary.
Guys!, here you have everything you need to improve the post-processing of your pieces economically and with easy-to-find materials, I would love to see your pieces applying these post-processing tips use the hashtag #nomanatips and tag me on instagram @nomanatech and to see your amazing pieces! And as always I wish you excellent prints! Blog contributed by Elias Ruiz.
Leave a comment