Four Steps to Level Your 3D Printer
--- All credits to Billie Ruben
Thanks to Ms. Billie Ruben for sharing her ideas about leveling a 3D printer and we have a chance to turn her photographic content into this article. Through her suggested steps, it’s no longer a problem for rookies to level a 3D printer. Let’s see her instructions step by step.
What may happen with a not well leveled 3D Printer?
A well leveled 3D printer indicates the nozzle’s adjusted to a same and appropriate distance, normally a paper thickness gap to different positions of the print bed. And we usually level the four corners of the print bed with four knobs below it.
A not well leveled 3D printer usually includes four different situations that lead to incorrect 3D printing with different symptoms.
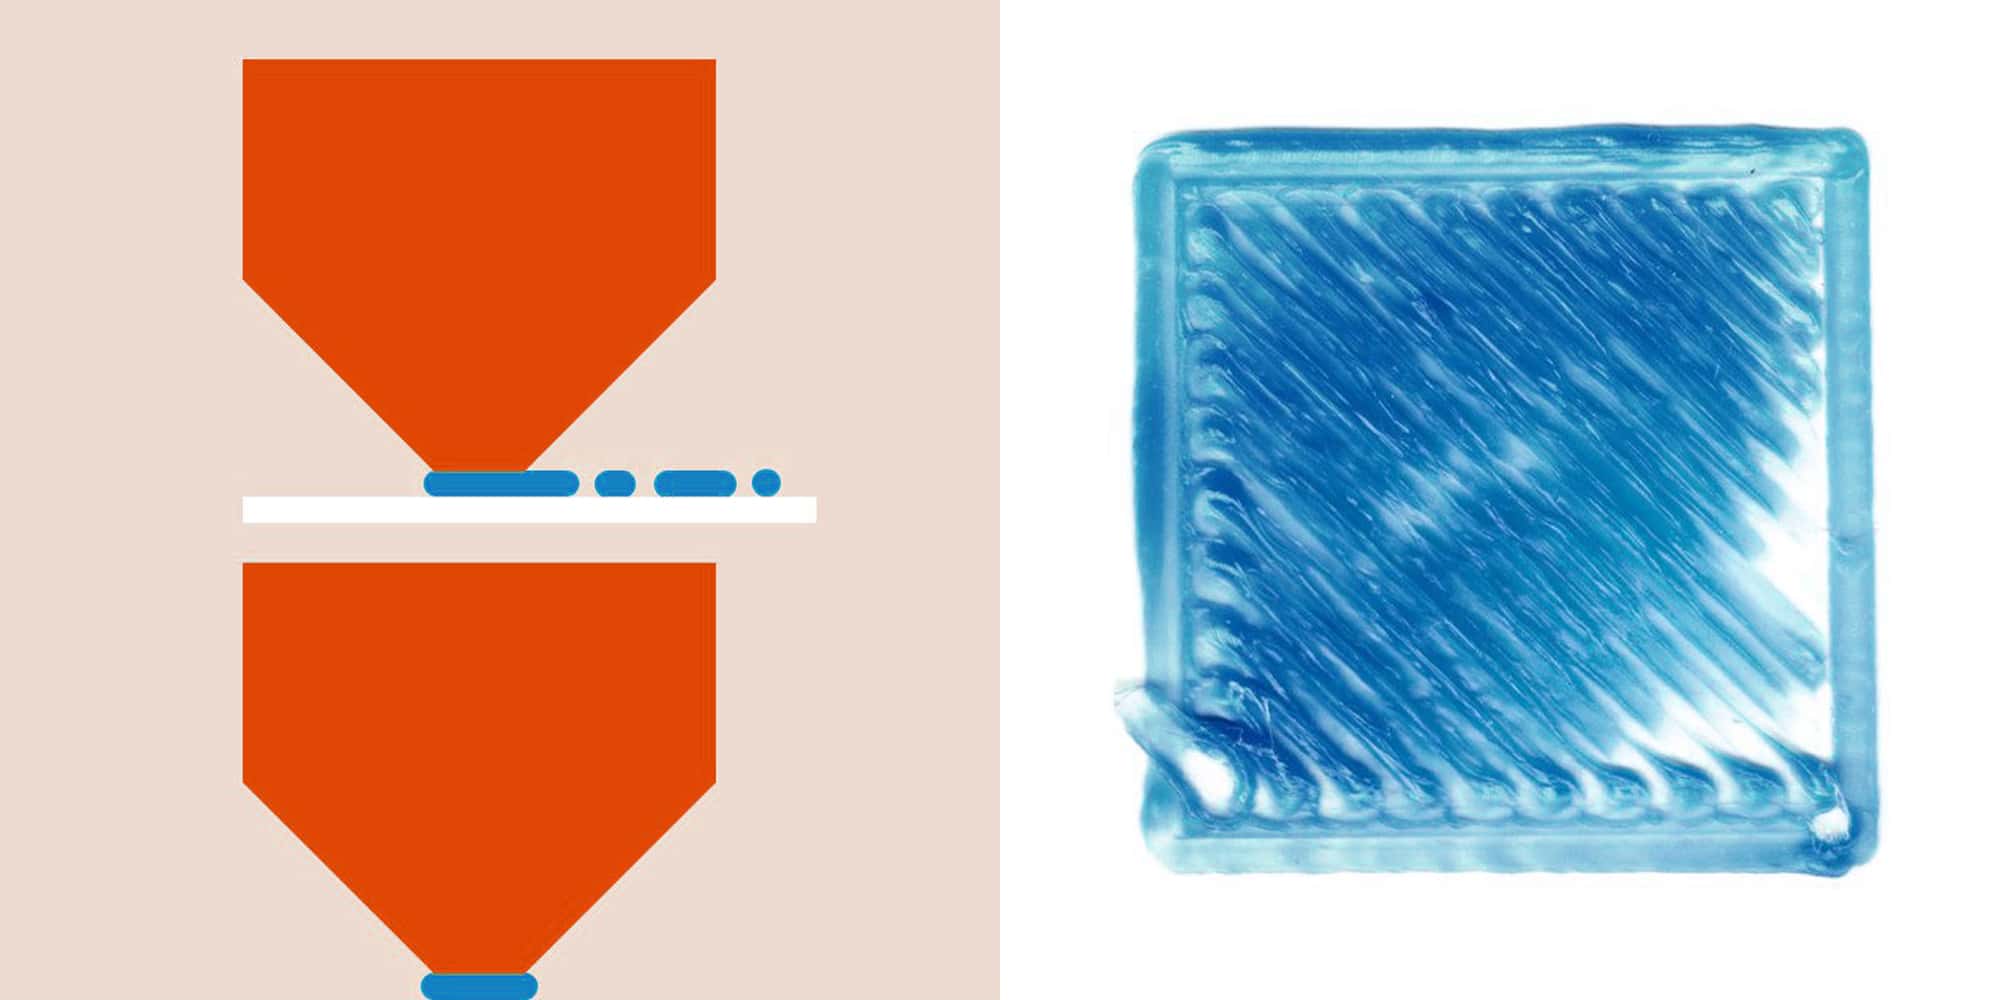
1.When the nozzle is leveled too close to the print bed, it extrudes inconsistent and sometimes doesn’t extrude because the bed blocks the nozzle. And even worse, too close distance between the nozzle and the print bed causes filament jamming.
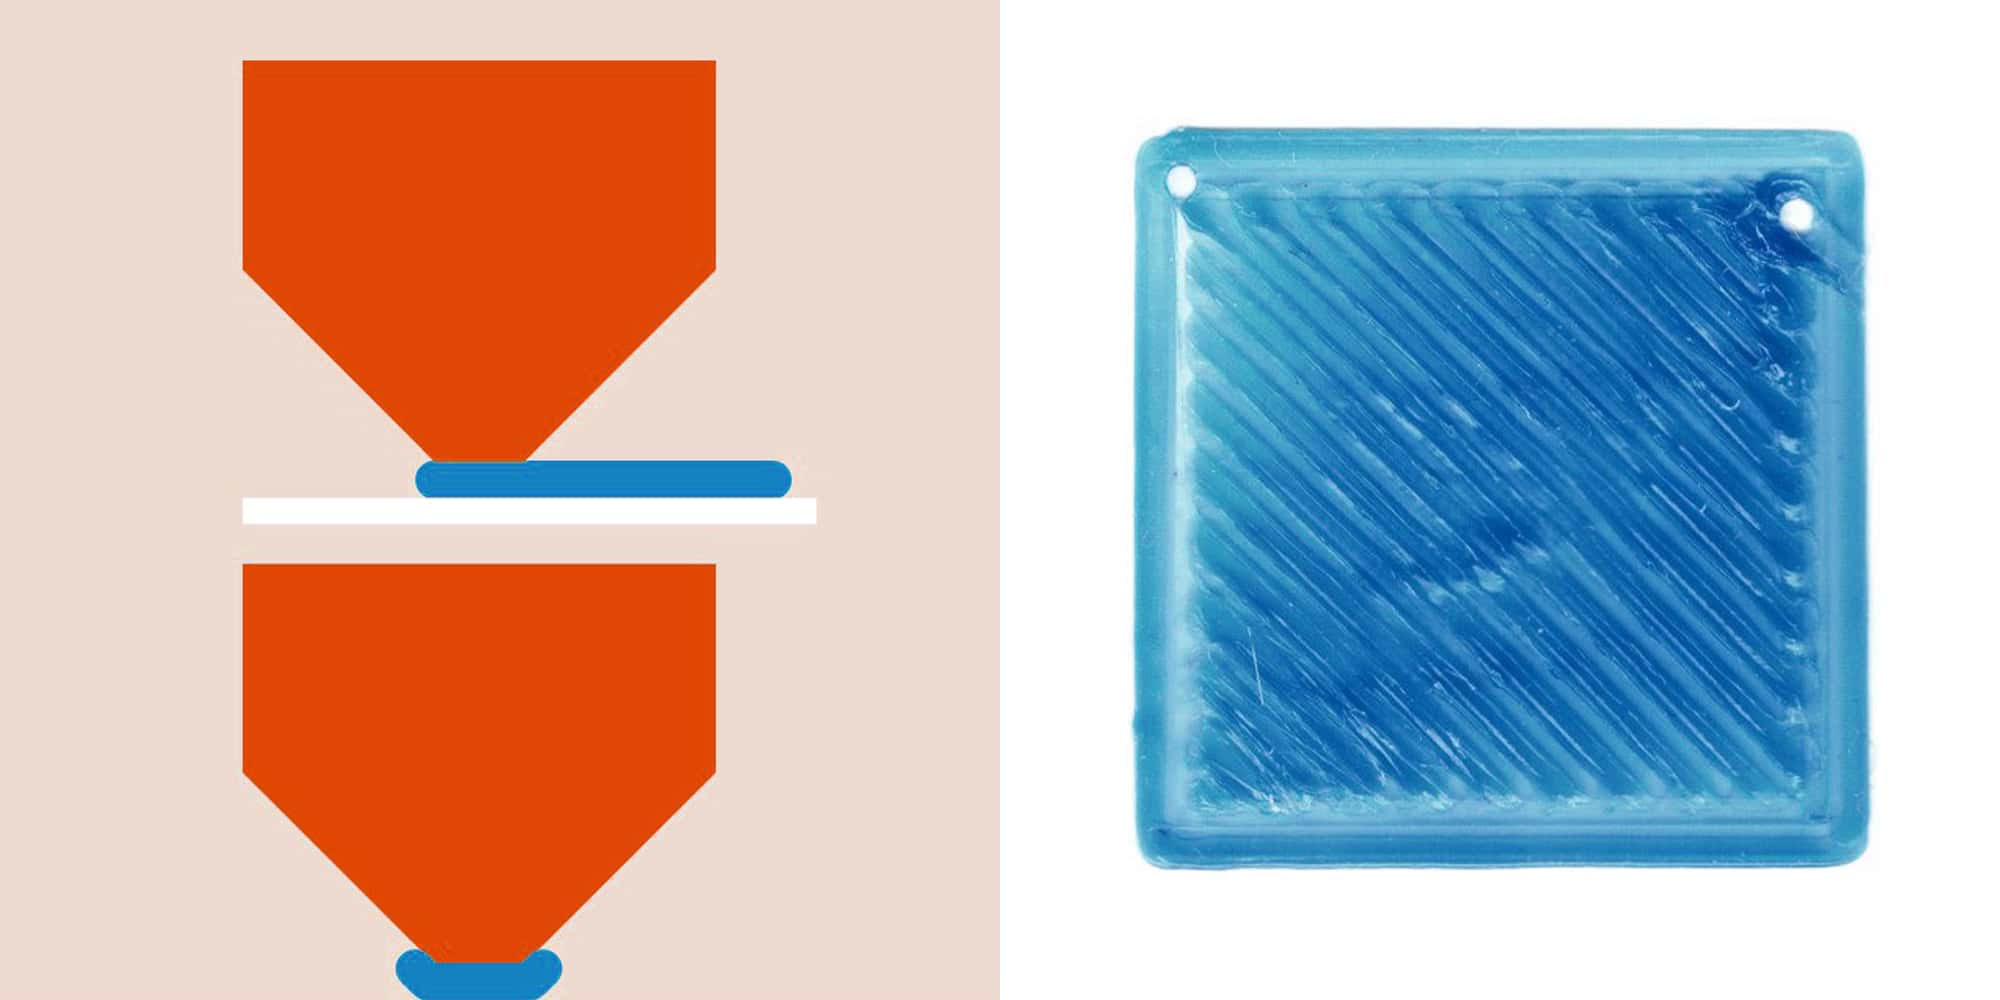
2.When the nozzle is a little closer, comparing to appropriate distance, to the print bed, it tends to extrude from the side, and the layer becomes partially thicker on the extruding side as below picture shows.
3.When the nozzles is leveled a little further, comparing to appropriate distance, to the print bed, it extrudes relatively round melted plastic and form small gaps between different lines.
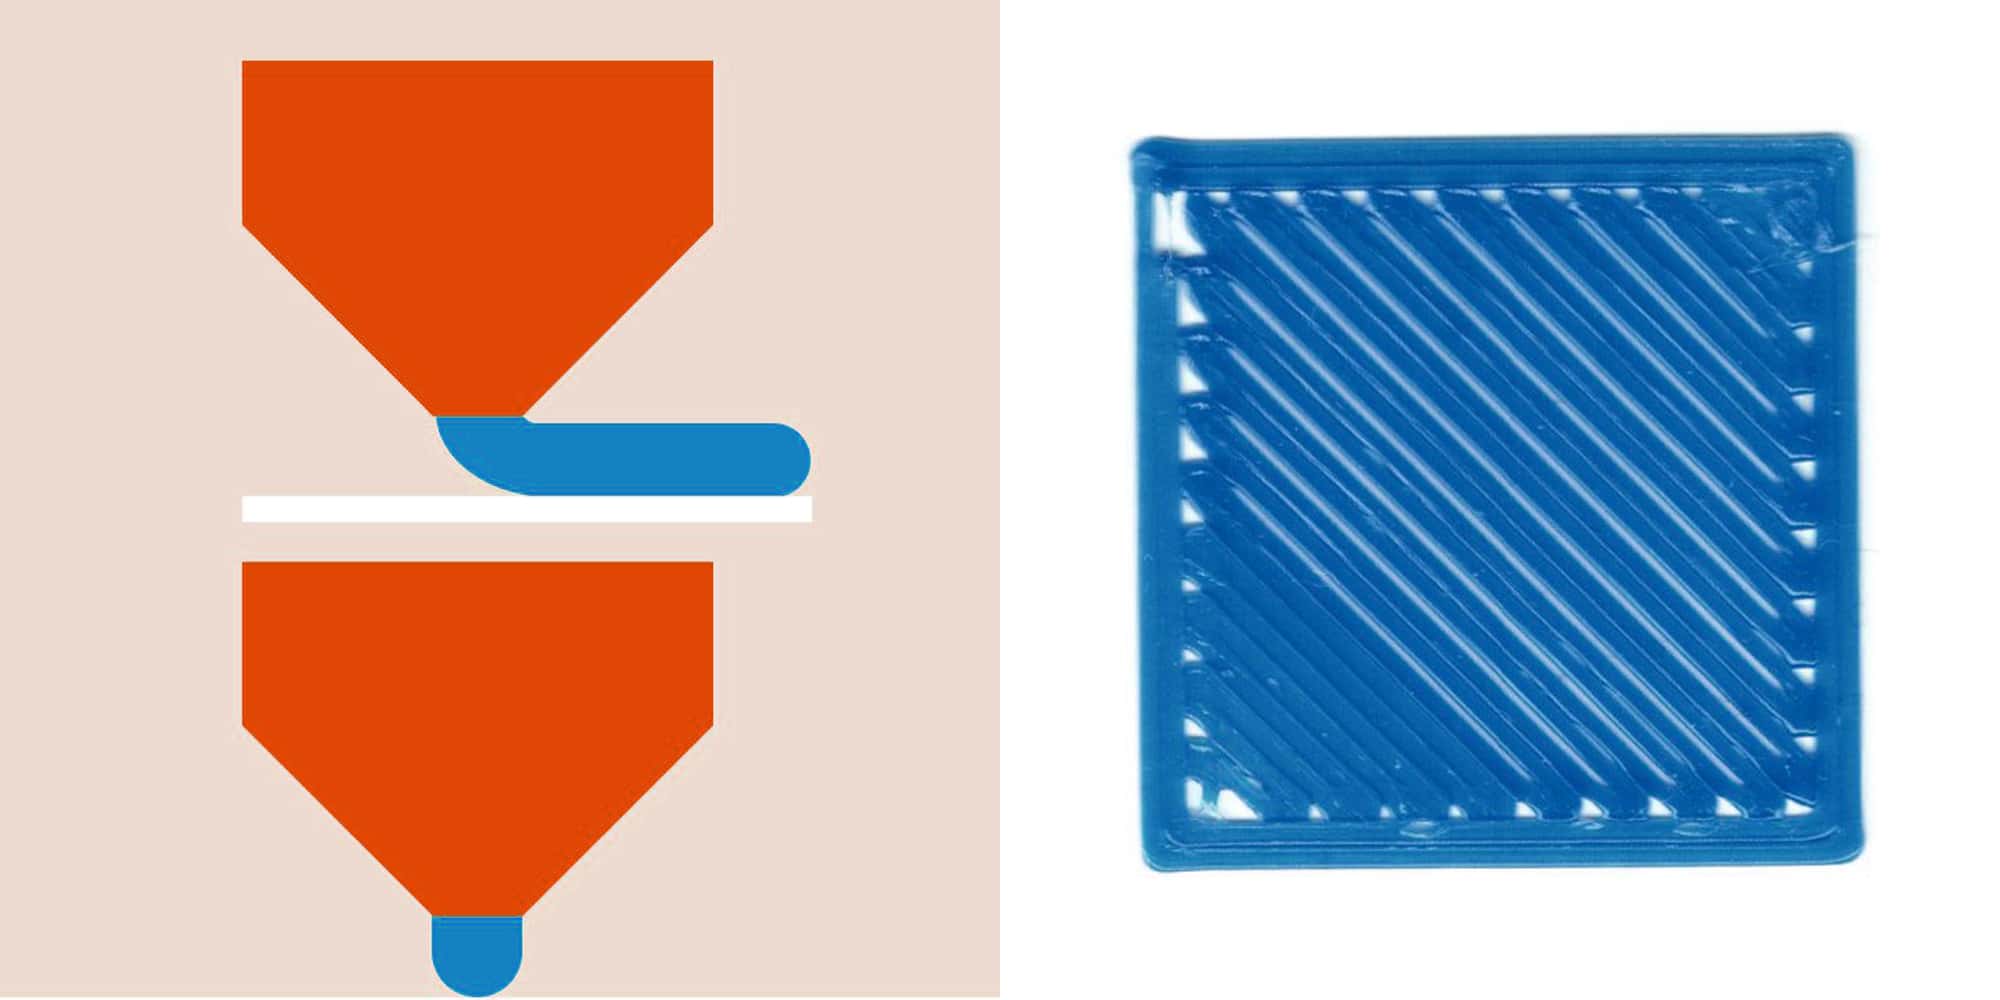
4.When the nozzle is leveled too further to the print bed, it extrudes super round plastic lines in large gaps. These lines don’t stich to each other and the layer warps.

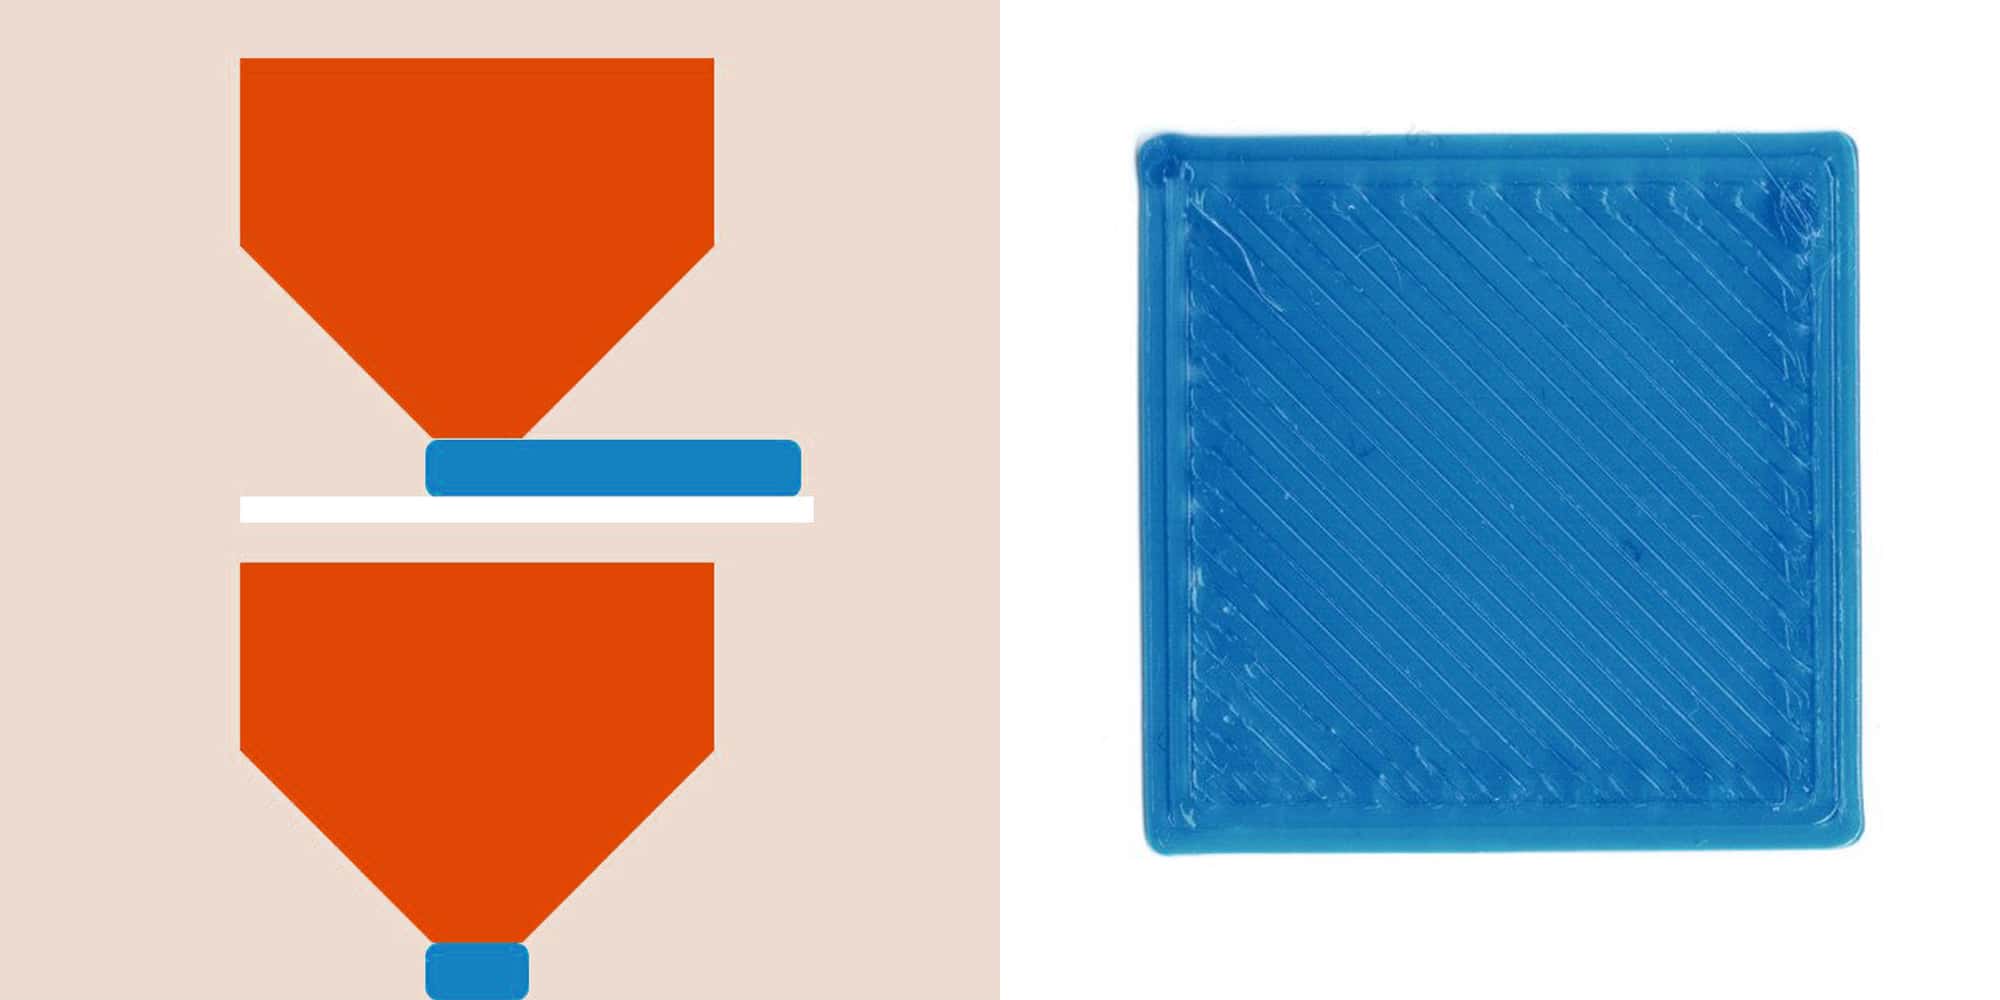
Only a well leveled 3D printer prints consistent and even layer lines (as below picture showed) and finally builds up fine 3D models.
How shall we level a 3D printer?
Below are four steps recommended by Ms. Billie Ruben to level and maintain a 3D printer.
1.Visual leveling
Move the nozzle to the lower left corner of the print bed first. And then adjust the knob to make the print bed just touch the nozzle. Turn the knob down slightly to make a tiny gap between the nozzle and the print bed. Repeat the above steps to adjust at the other three corners for the same gaps between the nozzle and the print bed.
2.Slice concentric layer lines
Use a slicer to make square layer lines at similar size with the print bed, and set print bed adhesion type to “brim” and bottom layer print style into concentric. And the final result appears like below.

3.Live leveling
Live adjust four knobs while printing above layer lines to keep a well deposited layer lines as below picture shows. This will further enhance the leveling to a more accurate condition.

4.Leveling maintenance
Through above three steps, actually a 3D printer is well leveled. To maintain it, you can set brim or skirt adhesion type whenever you print a 3D model and observe while the printer prints brim or skirt. If necessary, adjust the knobs again to level the 3D printer and prevent failed 3D printing.

And that’s all for today’s sharing of Ms. Billie Ruben photographic content for 3D printer leveling. Thanks again for her marvelous ideas that gives us a more easy way to level a 3D printer in daily use.
If you have any questions, please feel free to leave comments down below, our guys are waiting to help you. Joining our community is also a good idea, you can get information, model files, g-code files, tutorials and find the enthusiasts as you are. It's a place where creative people gathered, just hit the link: https://forum.anet3d.com/
Leave a comment