How to Cancel Auto Leveling on ET4 or ET4 Pro 3D printer
Capacitive leveling sensor assisted auto bed leveling can be a plus to compensate the result of manual leveling a 3D printer. But for experienced users, manual leveling is accurate enough and more reliable. Now let’s learn how to cancel auto leveling feature on Anet ET4 or ET4 Pro 3D printer.
Preparation for ET4 or ET4 Pro 3D printer auto leveling cancelling modification
To do the modification, let’s prepare below things:
ET4 or ET4 Pro 3D printer
Firmware for non-auto leveling modification
Printed limit switch mount*1
Printed limit actuating plate*1
M4 T-nuts*2
M3*10 socket head cap screws*2
M4*8 button head cap screws*2
2.45mm Mount Socket*1
Procedures for ET4 or ET4 Pro 3D printer auto leveling cancelling modification
Now, everything is ready and let’s proceeds to below steps to modify ET4 or ET4 3D printer with only manual bed leveling.
1. Download limit switch mount and actuating plate gcode or stl format files. And print the two files out.

2. Disconnect all wirings on the circuit board. Unscrew the circuit board and take it out.
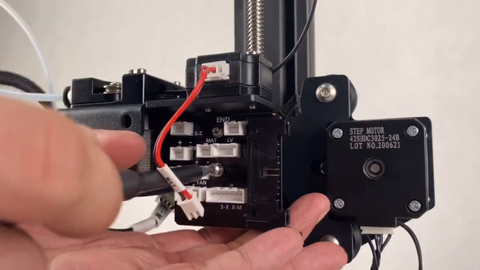
3. Mount the limit switch assembly underneath the filament sensor. Then, install the circuit board back and connect all wirings back except the LV connector (for the leveling sensor).
4. Plug in Z-limit wiring into the limit switch connector and the other side to the S-Z connector on the circuit board.
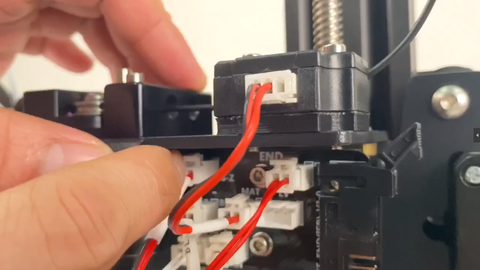
5. Tie wirings firmly with zip tie to avoid cable burns during movement.
6. Mount the limit actuating plate with its top aligned with the top of the Z-axis motor mount.
7. Download ET4 or ET4 Pro firmware for non-auto-leveling modification.
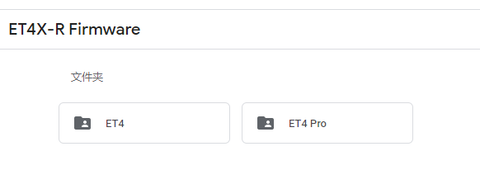
4. Put the downloaded file into a TF card.
5. Insert the TF card into the printer card slot.
6. Power on the printer and click on “Setting” – “Upgrade”.

7. The printer auto detects firmware file and executes firmware upgrade.
8. After firmware installation completes, disconnect the capacitive sensor.
9. Manual level the printer and do some test prints.
Tips for manual leveling the bed at the first time
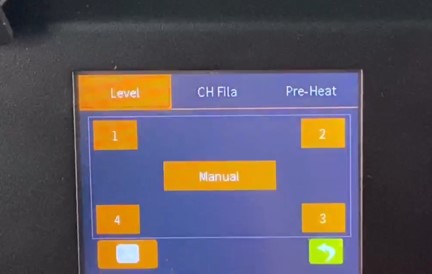
1. Anti-clockwise rotate the four knobs underneath the hot bed to full tighten it to the lowest position.2. Click on “Prepare” – “Level” – “Manual” and adjust hot bed height at the 1st, 2nd, 3rd and 4th corners once.
Comments
Leave a comment