How To 3D Print Lithophane in Color
You’re probably pretty good at 3D printing photos, even have made one or two lithophane lamps on your own. Grayscale lithophanes were already pretty amazing, but colors can add more interesting details to them. This article is going to tell you how to 3D print color lithophanes.
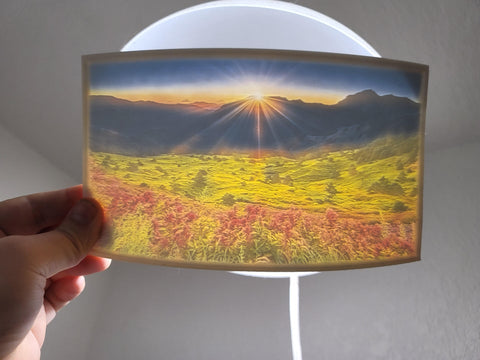
To give color to the lithophane, we don’t actually paint the lithophane. Instead, we color the light that comes out of the plastic. There are two different ways to do so. One of them allows you to get a color lithophane within 4 steps, while another can provide you a more vivid 3D print photo with full color.
Print Color Lithophane in 4 Steps
To color the light source, we can print the image on a piece of paper, and let the light passes through the paper before hits the lithophane. However, your original image will not work. For the reason that the lithophane has brightness information in it, you have to use a tailor-made image that removed the brightness levels.
Thanks to the ItsLitho (Link: https://tool.itslitho.com/CreateModel ), we can easily get the tailor-made image at the same time we creating the 3D model of our photos. We will show you how to make the color lithophane step by step.
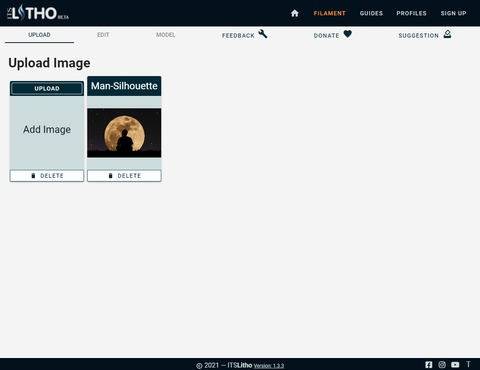
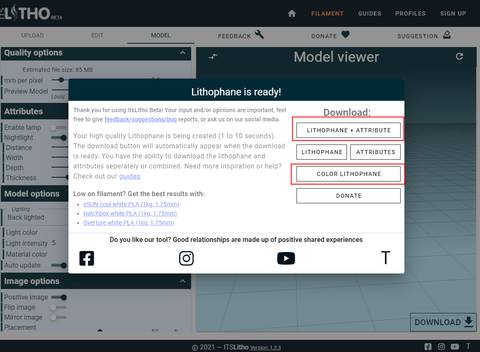
Step 1: Upload the image you chose
Using the ItsLitho (Link: https://tool.itslitho.com/CreateModel) create your lithophane, you can start by uploading the image you want to convert into a lithophane.
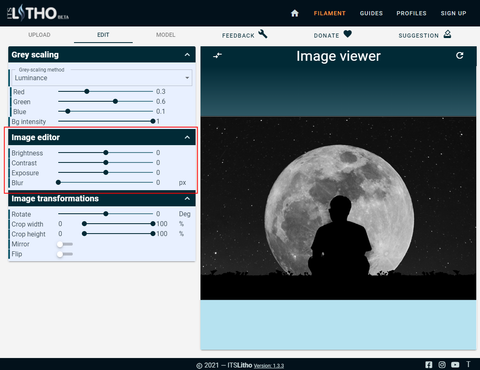
You can enhance the image by increasing the contrast on the EDIT page.
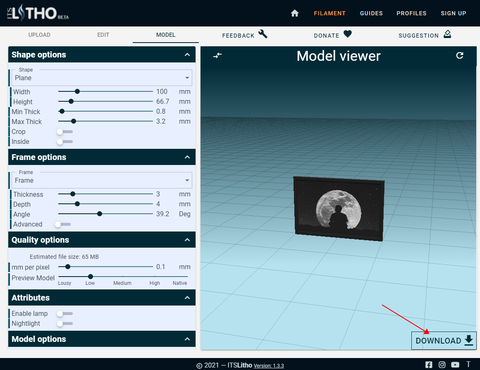
MODEL page is for designing your 3D model lithophane. Set the parameter in the same way as the greyscale lithophane. You could get reference from the recommended cura settings for lithophane print in our previous blog. After that just press the DOWNLOAD button in the corner.
Step 2: Download The 3D Print Image File
A few seconds after you click the DOWNLOAD button, the window will pop up and show you the button to download the files. For the color lithophane, you should download two files. One is the STL file of the 3D model lithophane. Another is the tailor-made image that has removed brightness levels.
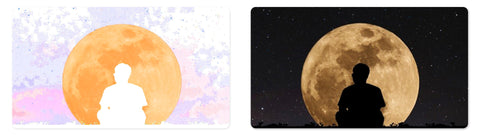
Here is the comparison between the original image and the tailor-made image.
Step 3: Print the model and the image
Now you have two types of files ready, and you have to print them separately. 3D prints your STL model. 2D color prints the tailor-made image on paper. We need to pay attention to the image dimensions. Some programs will fit your image on the entire A4 paper by default. We want the JPG file printed in the exact dimensions of the lithophane you made. Therefore, you have to pay attention when doing the scaling setting of printing.
Step 4: Attach the printed image on the back of the lithophane
The last step is to stick the image you printed on the back of the lithophane. There are several adhesives you can use, except for liquid adhesives, which will make the paper wet and crumple and mess up the color. Cheap transparent adhesive tape works well on this.
Now you have your color lithophane ready!
3D printed Full-color Lithophane
You can easily get a color lithophane using the method above. But it works well with a spherical lithophane because it’s not possible to map a flat sheet of paper on a sphere without cutting the paper.

Now, we will introduce you to the method of the completely 3D printed full color lithophanes, which will provide you a more vivid visual effect.
Principle behind the 3D printed color Lithophane
For printing color lithophanes, it can be seen as 3D print the tailor-made image mentioned above as the base instead of the white base of the lithophane. And the image will be printed into 5 different layers which are very thin. When you overlap them, the colors will blend together and match up to the color of the tailor-made image.
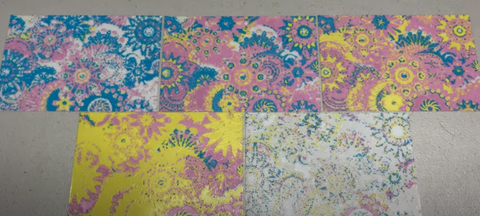
The blend of 5 layers follows the YMCK color pattern. YMCK color pattern creates various colors by changing the degree of 4 colors: Cyan, Magenta, Yellow and Key color. Therefore, it needs these four colors filaments to print color lithophane, and you need a 3D printer using a multi-material unit. Such as Mosaic Palette 2 or Prusa with MMU2S add-on.
Create Color Lithophane STL Files
You have to break the image into layers with different colors. Thanks to the LithophaneMaker (Link: https://www.lithophanemaker.com/Color%20Lithophane.html#processing ), an online free tool that helps you create STL files for every layer.
It’s better to leave most of the parameters at default, but there are a few things we are going to emphasize.
One thing is the Colored Resolution. It refers to the pixels on each colored layer. The parameter depends on the width of your extruder, and as recommended on the page, 2 or 3 times the extruder width is good. With the smaller parameter, you can get more details.
The next important thing is the Layer Height. This is the layer height of the color portion. It’s better to be as thin as possible because the colored layer will block more light than the white layer.
The final thing that is really important is the Select Palette area.
It provides 4 different choices and each refers to a specific color palette. You have to make sure you have selected the correct color palette for the filament colors you have.
Matters need attention when slicing
Once you have all 5 STL files created and downloaded, there still are a couple of important things you have to careful with when setting the slicer.
The first thing is the layer height. The layer height here needs to match the layer height that you chose in the LithophaneMaker. If you want the lithophane part printed in the different layer heights, you can change it once the color portion is printed.
Another thing is that you better always check the preview. There should not have empty pockets on your preview.
If you find lots of little empty pockets on it, it probably means that your extrusion width is not lined up with the pixel size (Colored Resolution) you set in the LithophaneMaker. You have to alter one of them to make sure they have lined up.
The last thing we want to remind you is about over extrude. When printing these pixelated images with so many details, the last thing you want is over extrusion. It can be under extruded a little bit, rather than over extruded. Over extrusion may cause two problems. One is the hot end jam, which is the common consequence of over extrusion. Another one is that your prints will look melted or smeared if it’s over extruded. Therefore, if it’s an either-or thing, we recommend the under extrusion side.
Now it’s time to light up your 3D print photo with colors! You can easily get very cool lithophanes in the first way. If you want a more delicate result, you can have a try on the second method. Also, you can make a color lithophane lamp, and that will be amazing as a gift.
Leave a comment