Tips for Easy Anet A8 Plus 3D Printer Assembly
The Anet A8 Plus is actually an easy to install 3D printer. With below tips from Bricoloup, a YouTube channel dedicated on broadcasting 3D printing, we’ll do the assembly of Anet A8 Plus 3D printer more precisely.
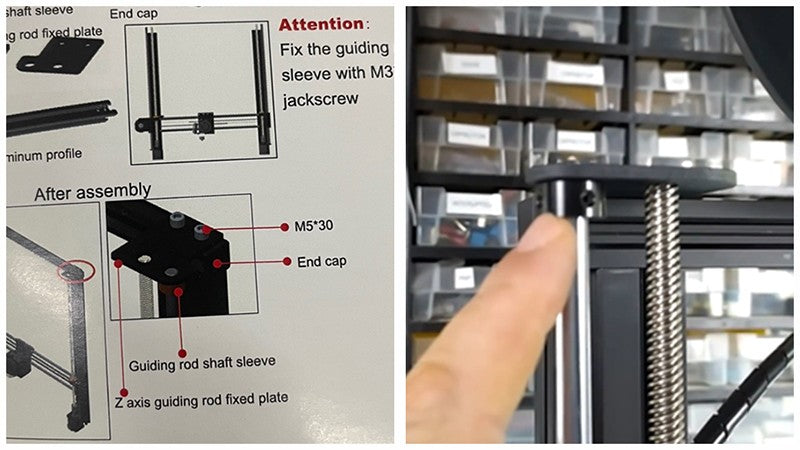
1. Guiding Rod Shaft Sleeve
This guiding rod shaft sleeve is not well described in the A8 Plus manual. It can prevent it from going up to high. People who are not good at English may get confused about the name and don’t know where to install it. Let’s check out in the user manual and remember to install it correctly.
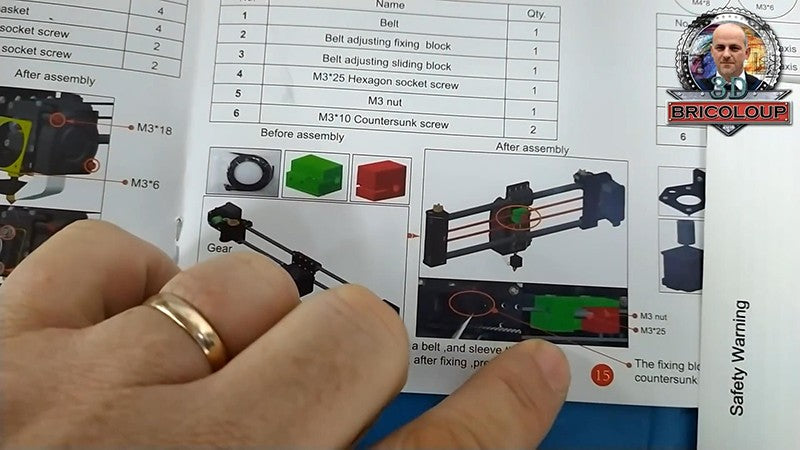
2. Y-axis Belt Tensioner
The fixing block and sliding block in above picture are actually black colored. We can mount them with M3*25 hexagon socket screw and M3 nut. These two parts are fragile and we suggest you to print some replacements. Download Y-axis belt tensioner of Anet A8 Plus here: http://3dprintingmods.com/3d-printable-parts-on-anet-a8-plus/
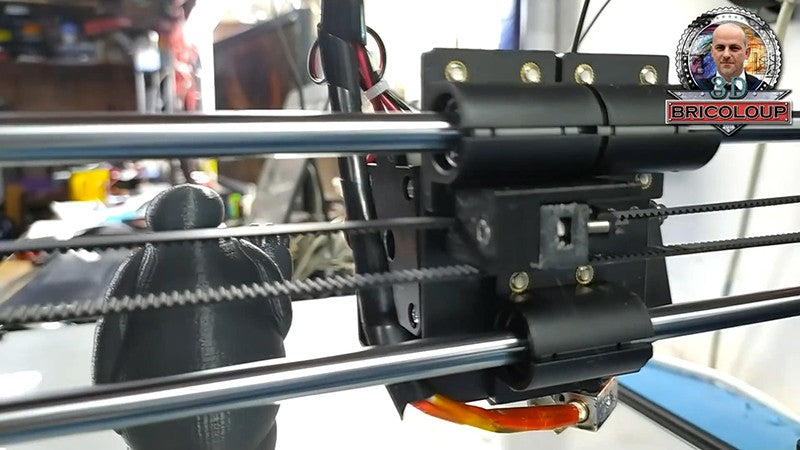
3. Y-axis Rod Holder with Limit Switch
And the end of Y-axis, there is a limit switch that need to be fixed on a 3D printed rod holder. The limit switch defines the Y direction for the extruder. This 3d printed holder is also fragile. You could print a few replacements for any cases. Download Y-axis rod holder with limit switch printed parts stl file here: http://3dprintingmods.com/3d-printable-parts-on-anet-a8-plus/
Leave a comment