File Setup in Ultimaker Cura 4.7.1 for an Anet ET5X 3D Printer
For most 3D printing enthusiasts, the final outcome of a well printed 3D model is the most important thing. People are likely to question your skills in 3D printing if you get a printed low quality 3D model. It’s more frustrating than a totally failed 3D printing at the beginning.
A perfect printed 3D model demonstrated top quality of its original 3D file at three aspects, including detailed textures, gloss looking and solid structure.
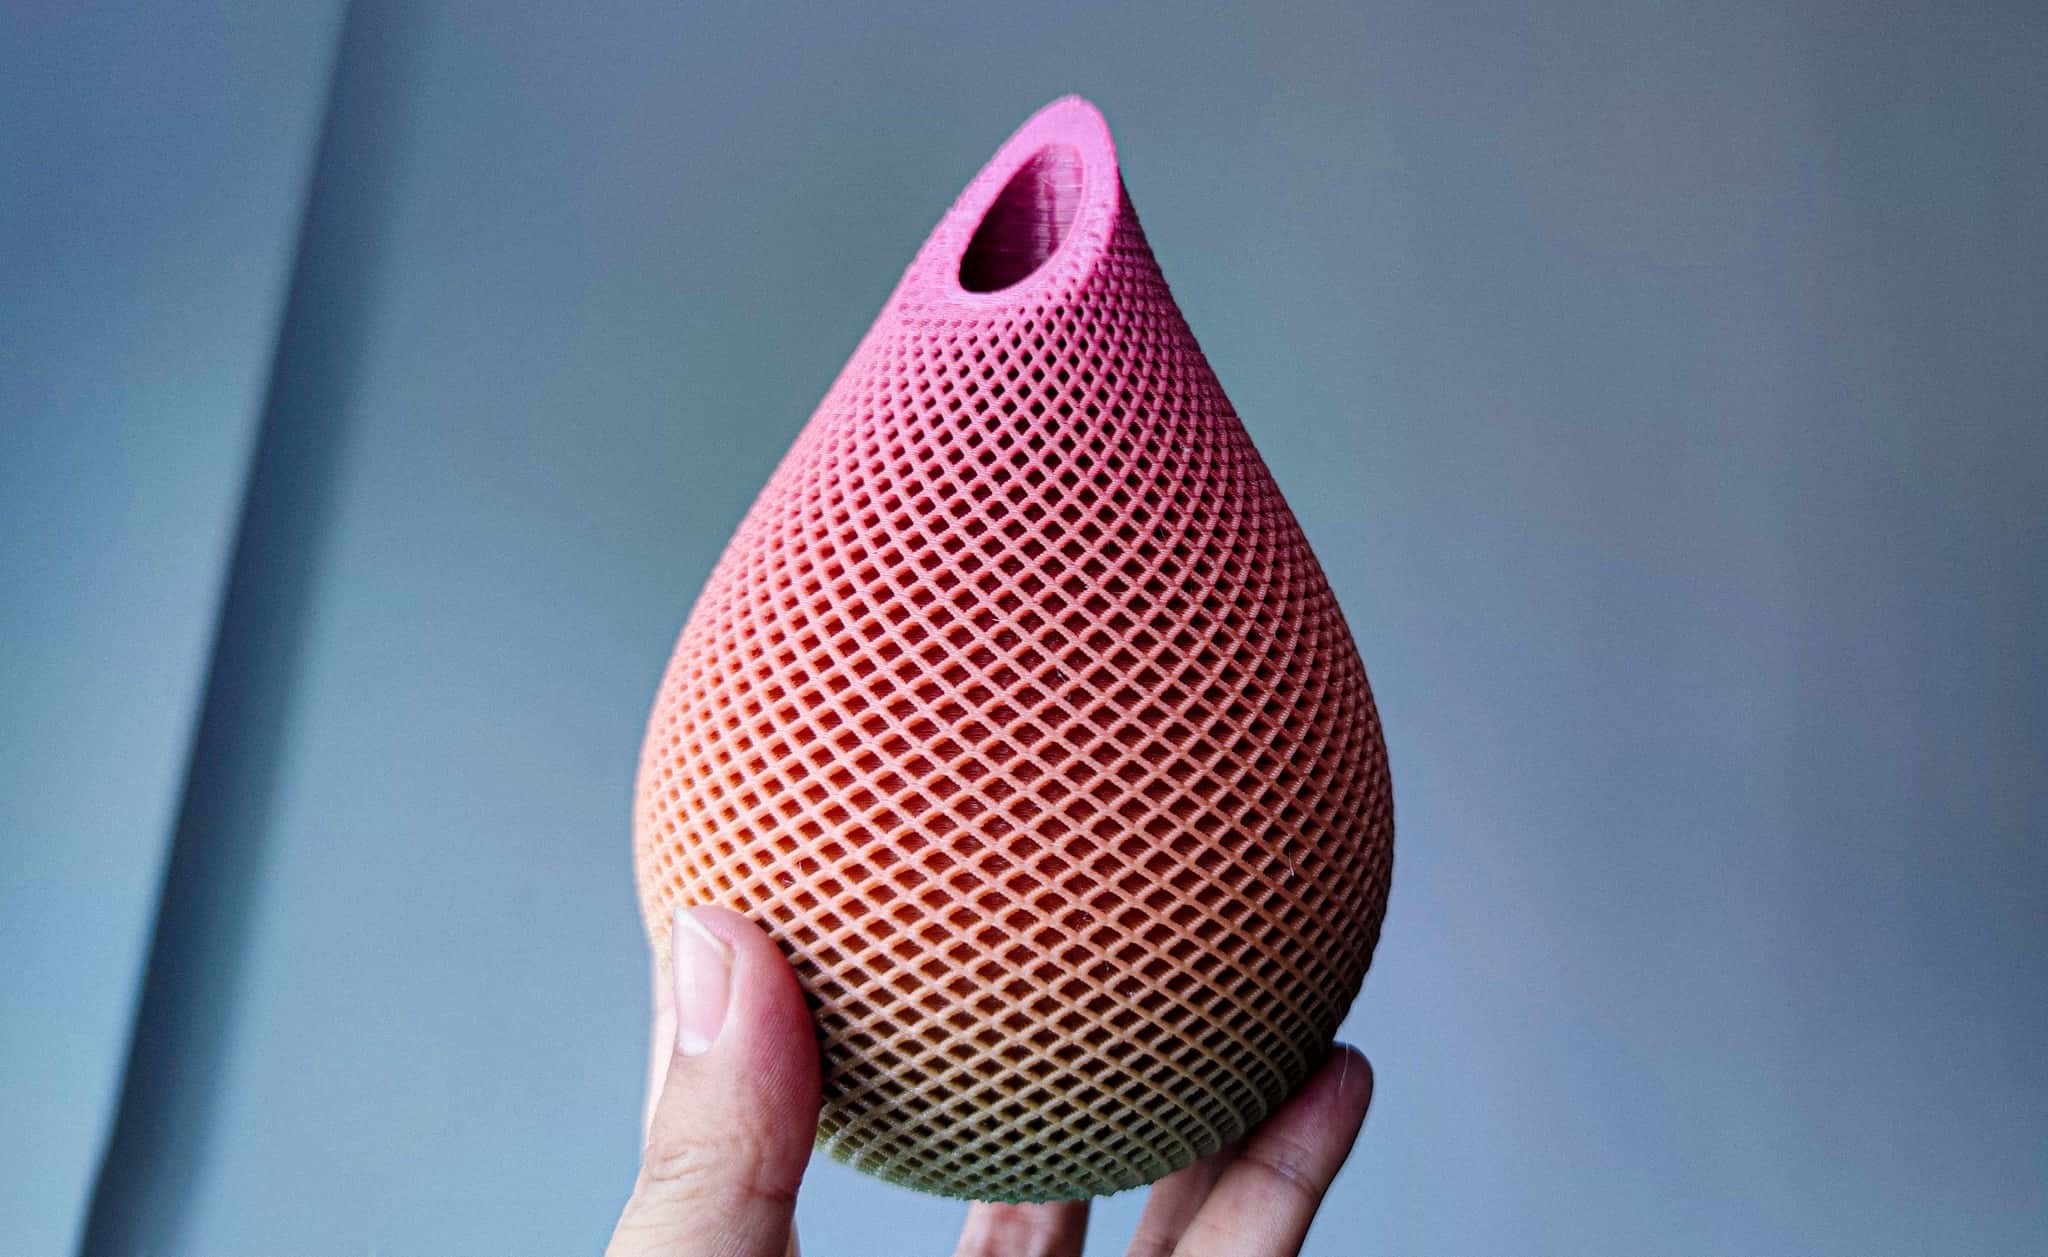
It’s easy to achieve the above mentioned result with right settings on Cura, top quality 3D printer and filament.
Here are some setting recommendations on the Ultimaker Cura when you’re using an Anet ET5X (or ET5, ET5 Pro) 3D printer. You need only some simple revises on default settings to get a better 3D printing result.
The first thing to do is to update Cura to the new 4.7.1 version. The new version provides some useful new features.
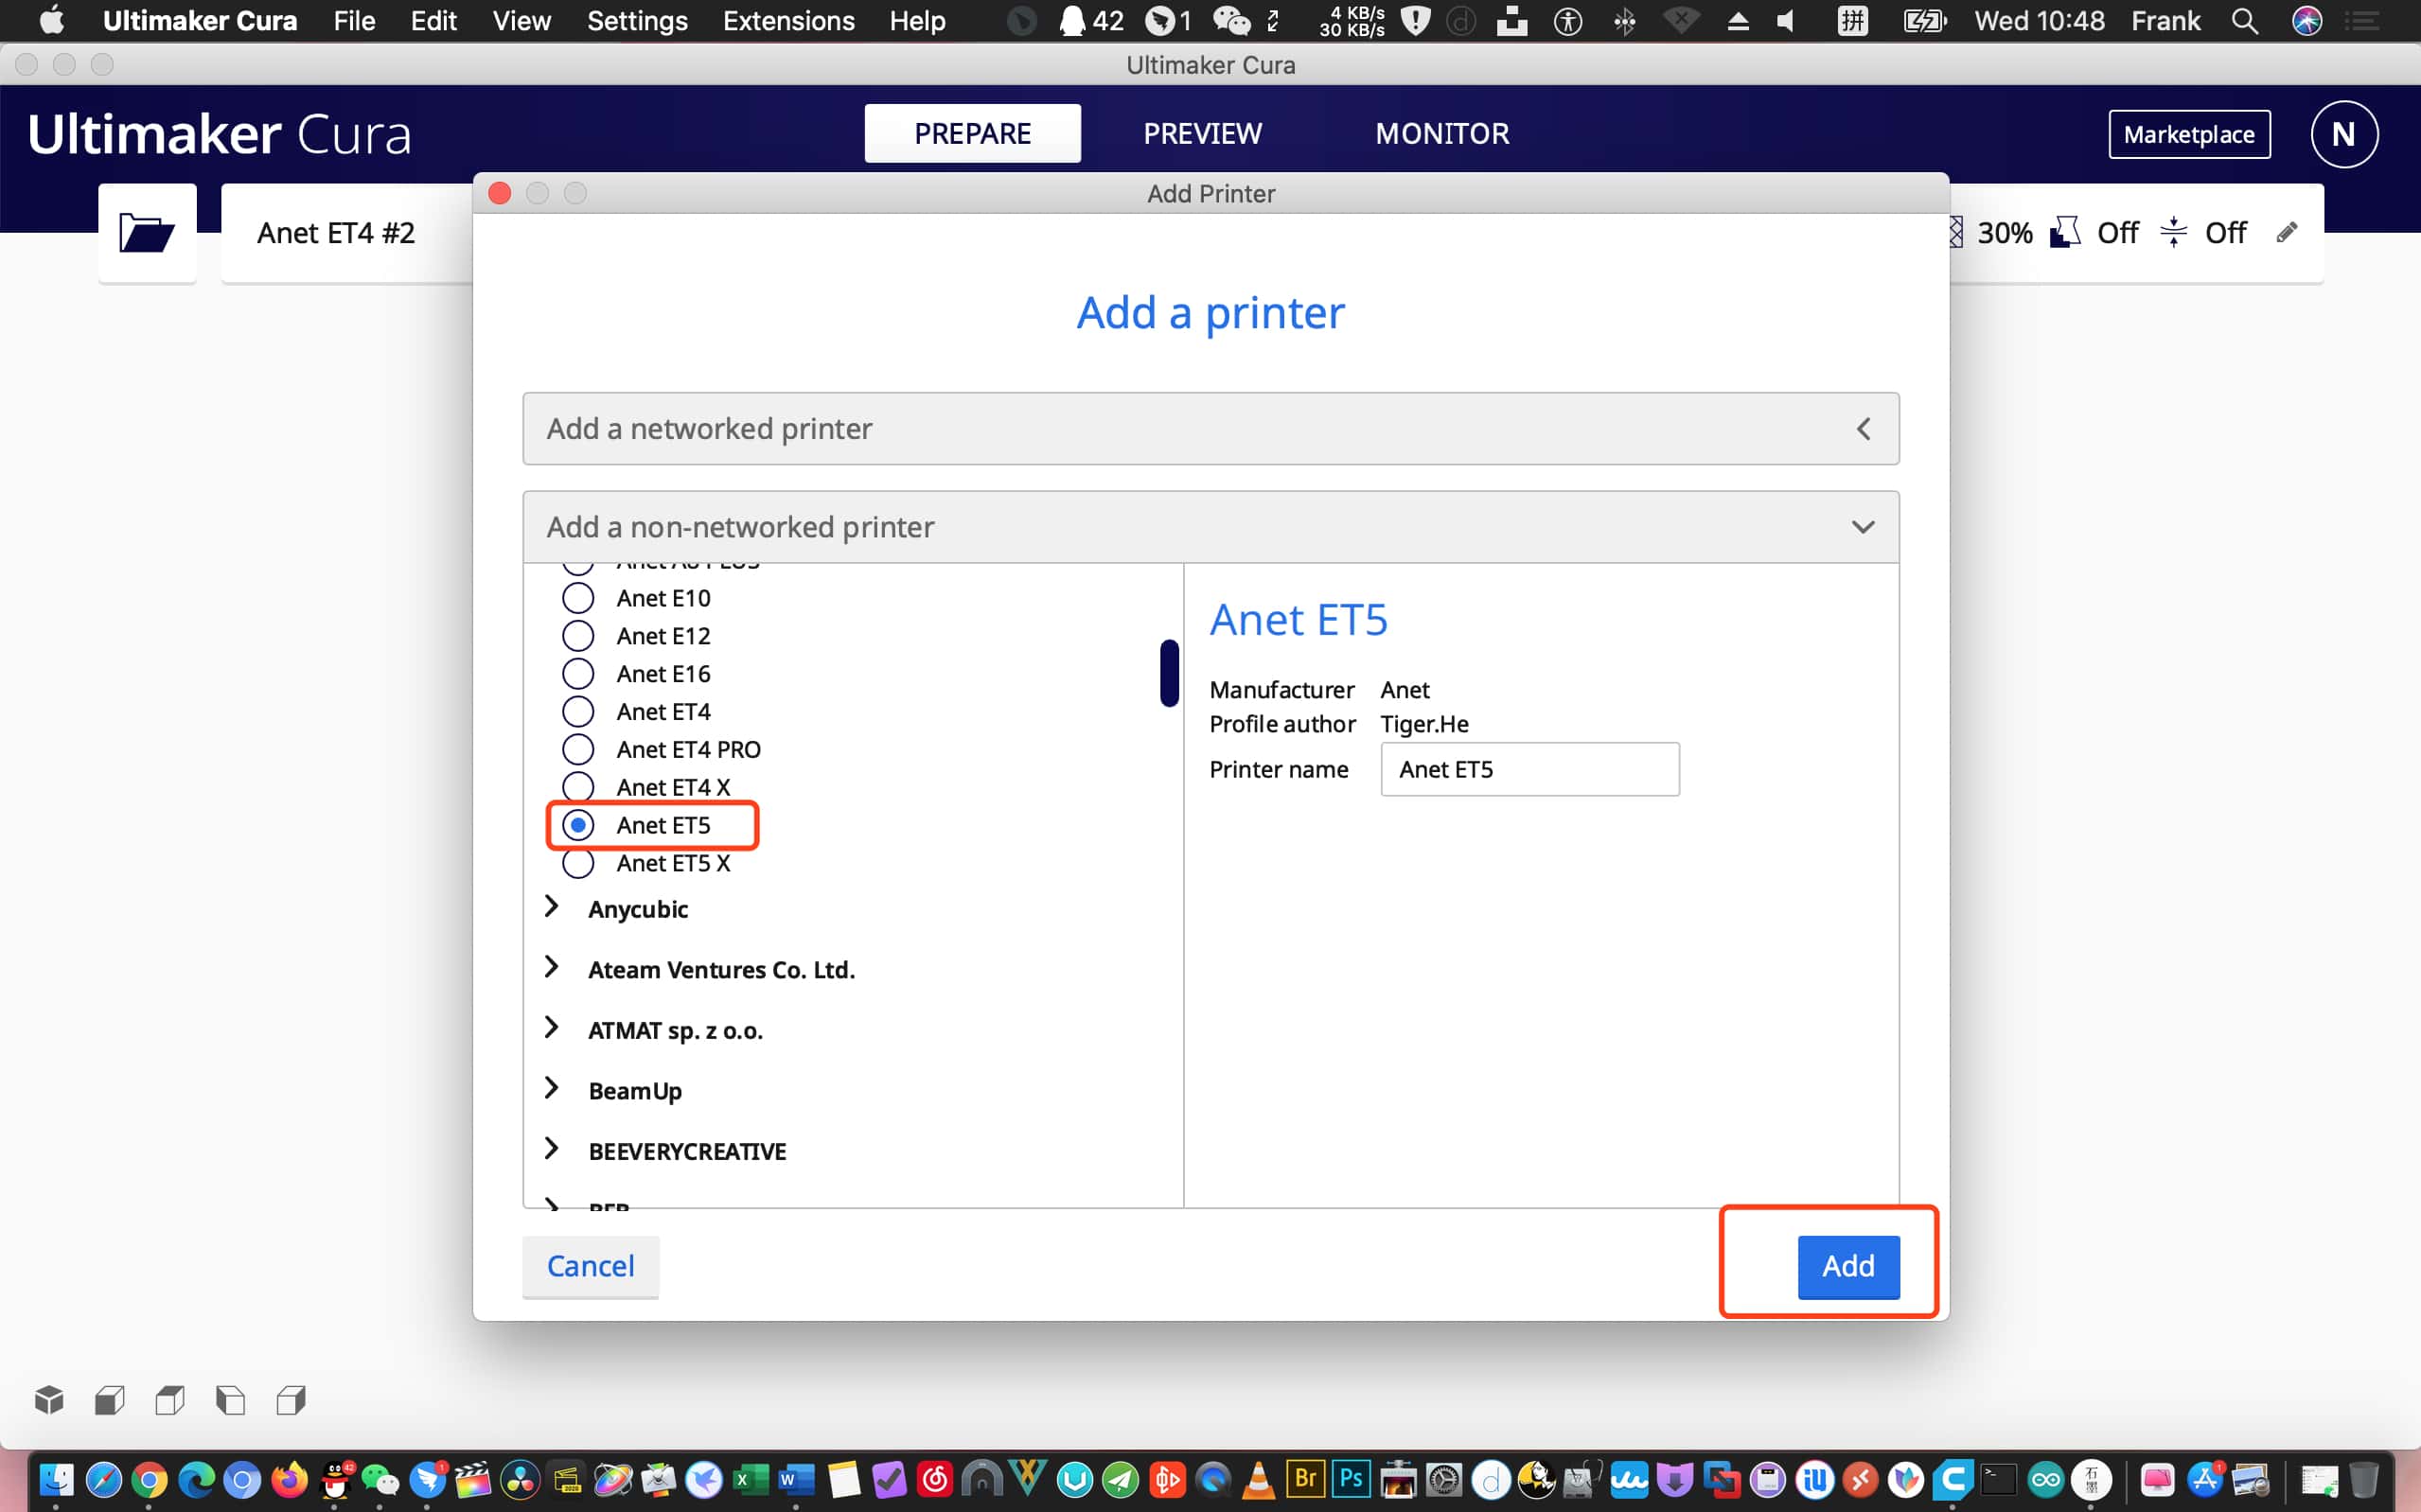
And after Cura updated, we open it and add in ET5 (or ET5 Pro) 3D printer at default setting.
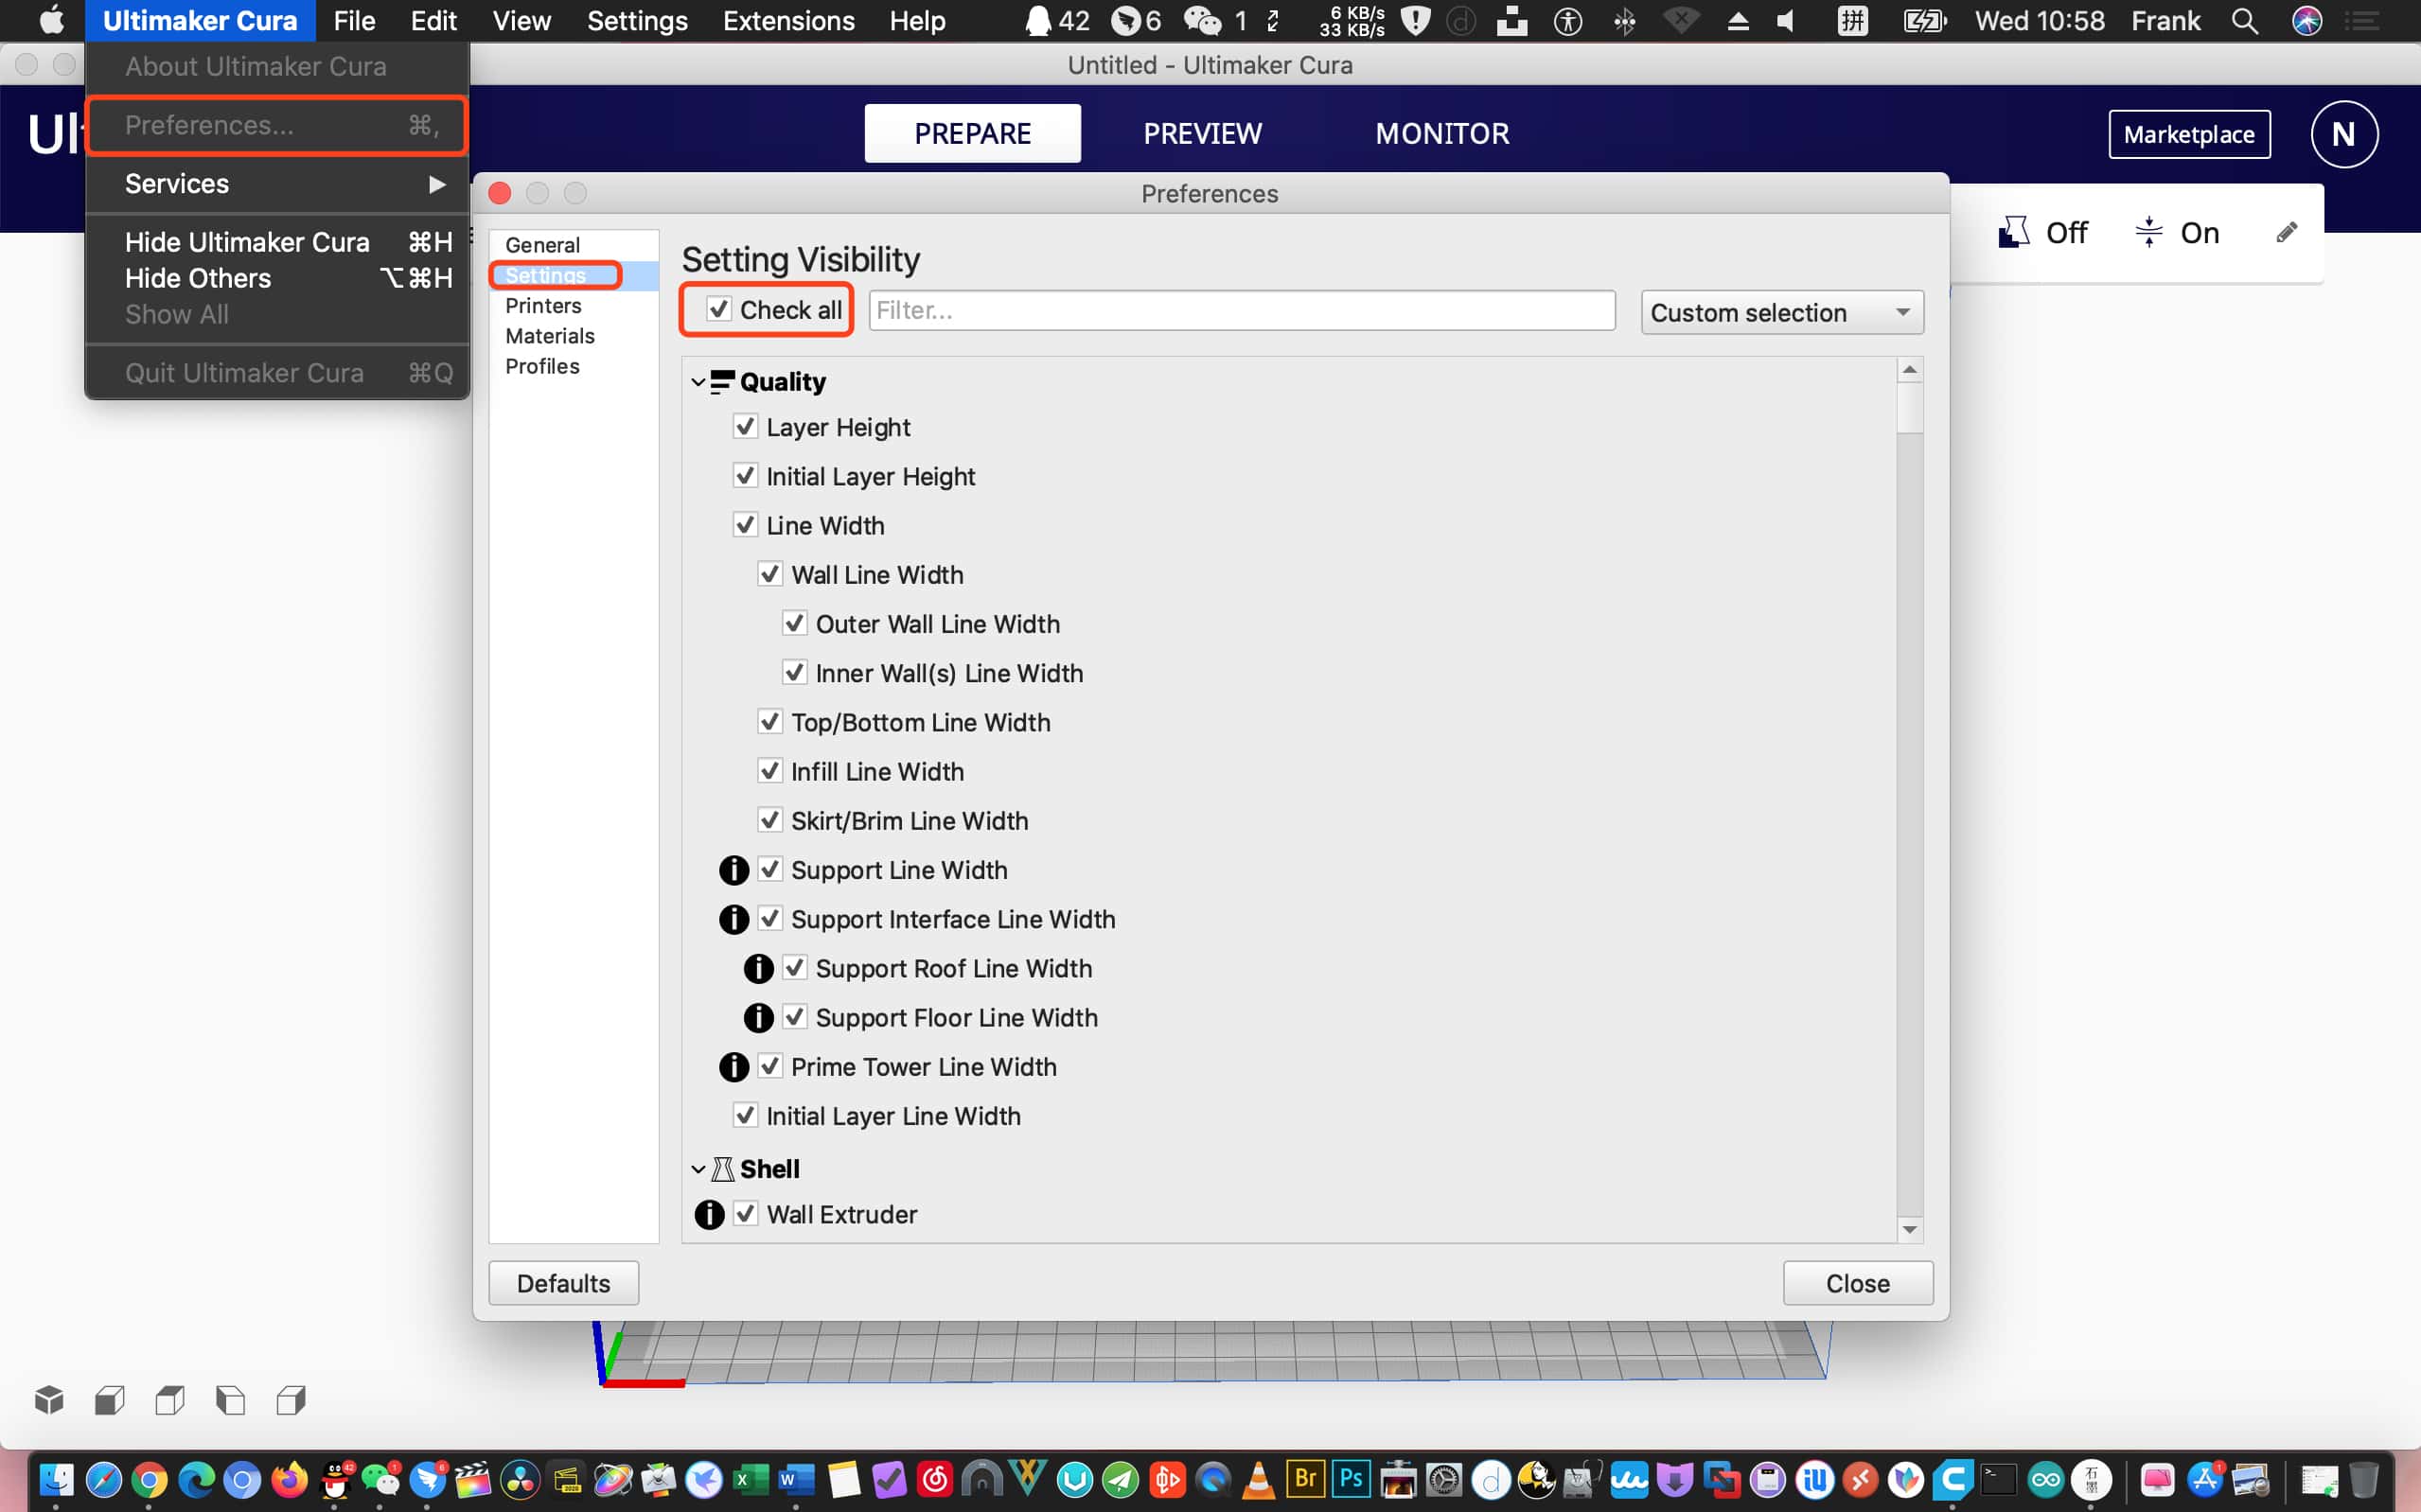
Make sure all advanced settings are applied. Select “check all” in “settings” inside “preference” section and restart the software. (Note: works the same in a windows O.S PC)
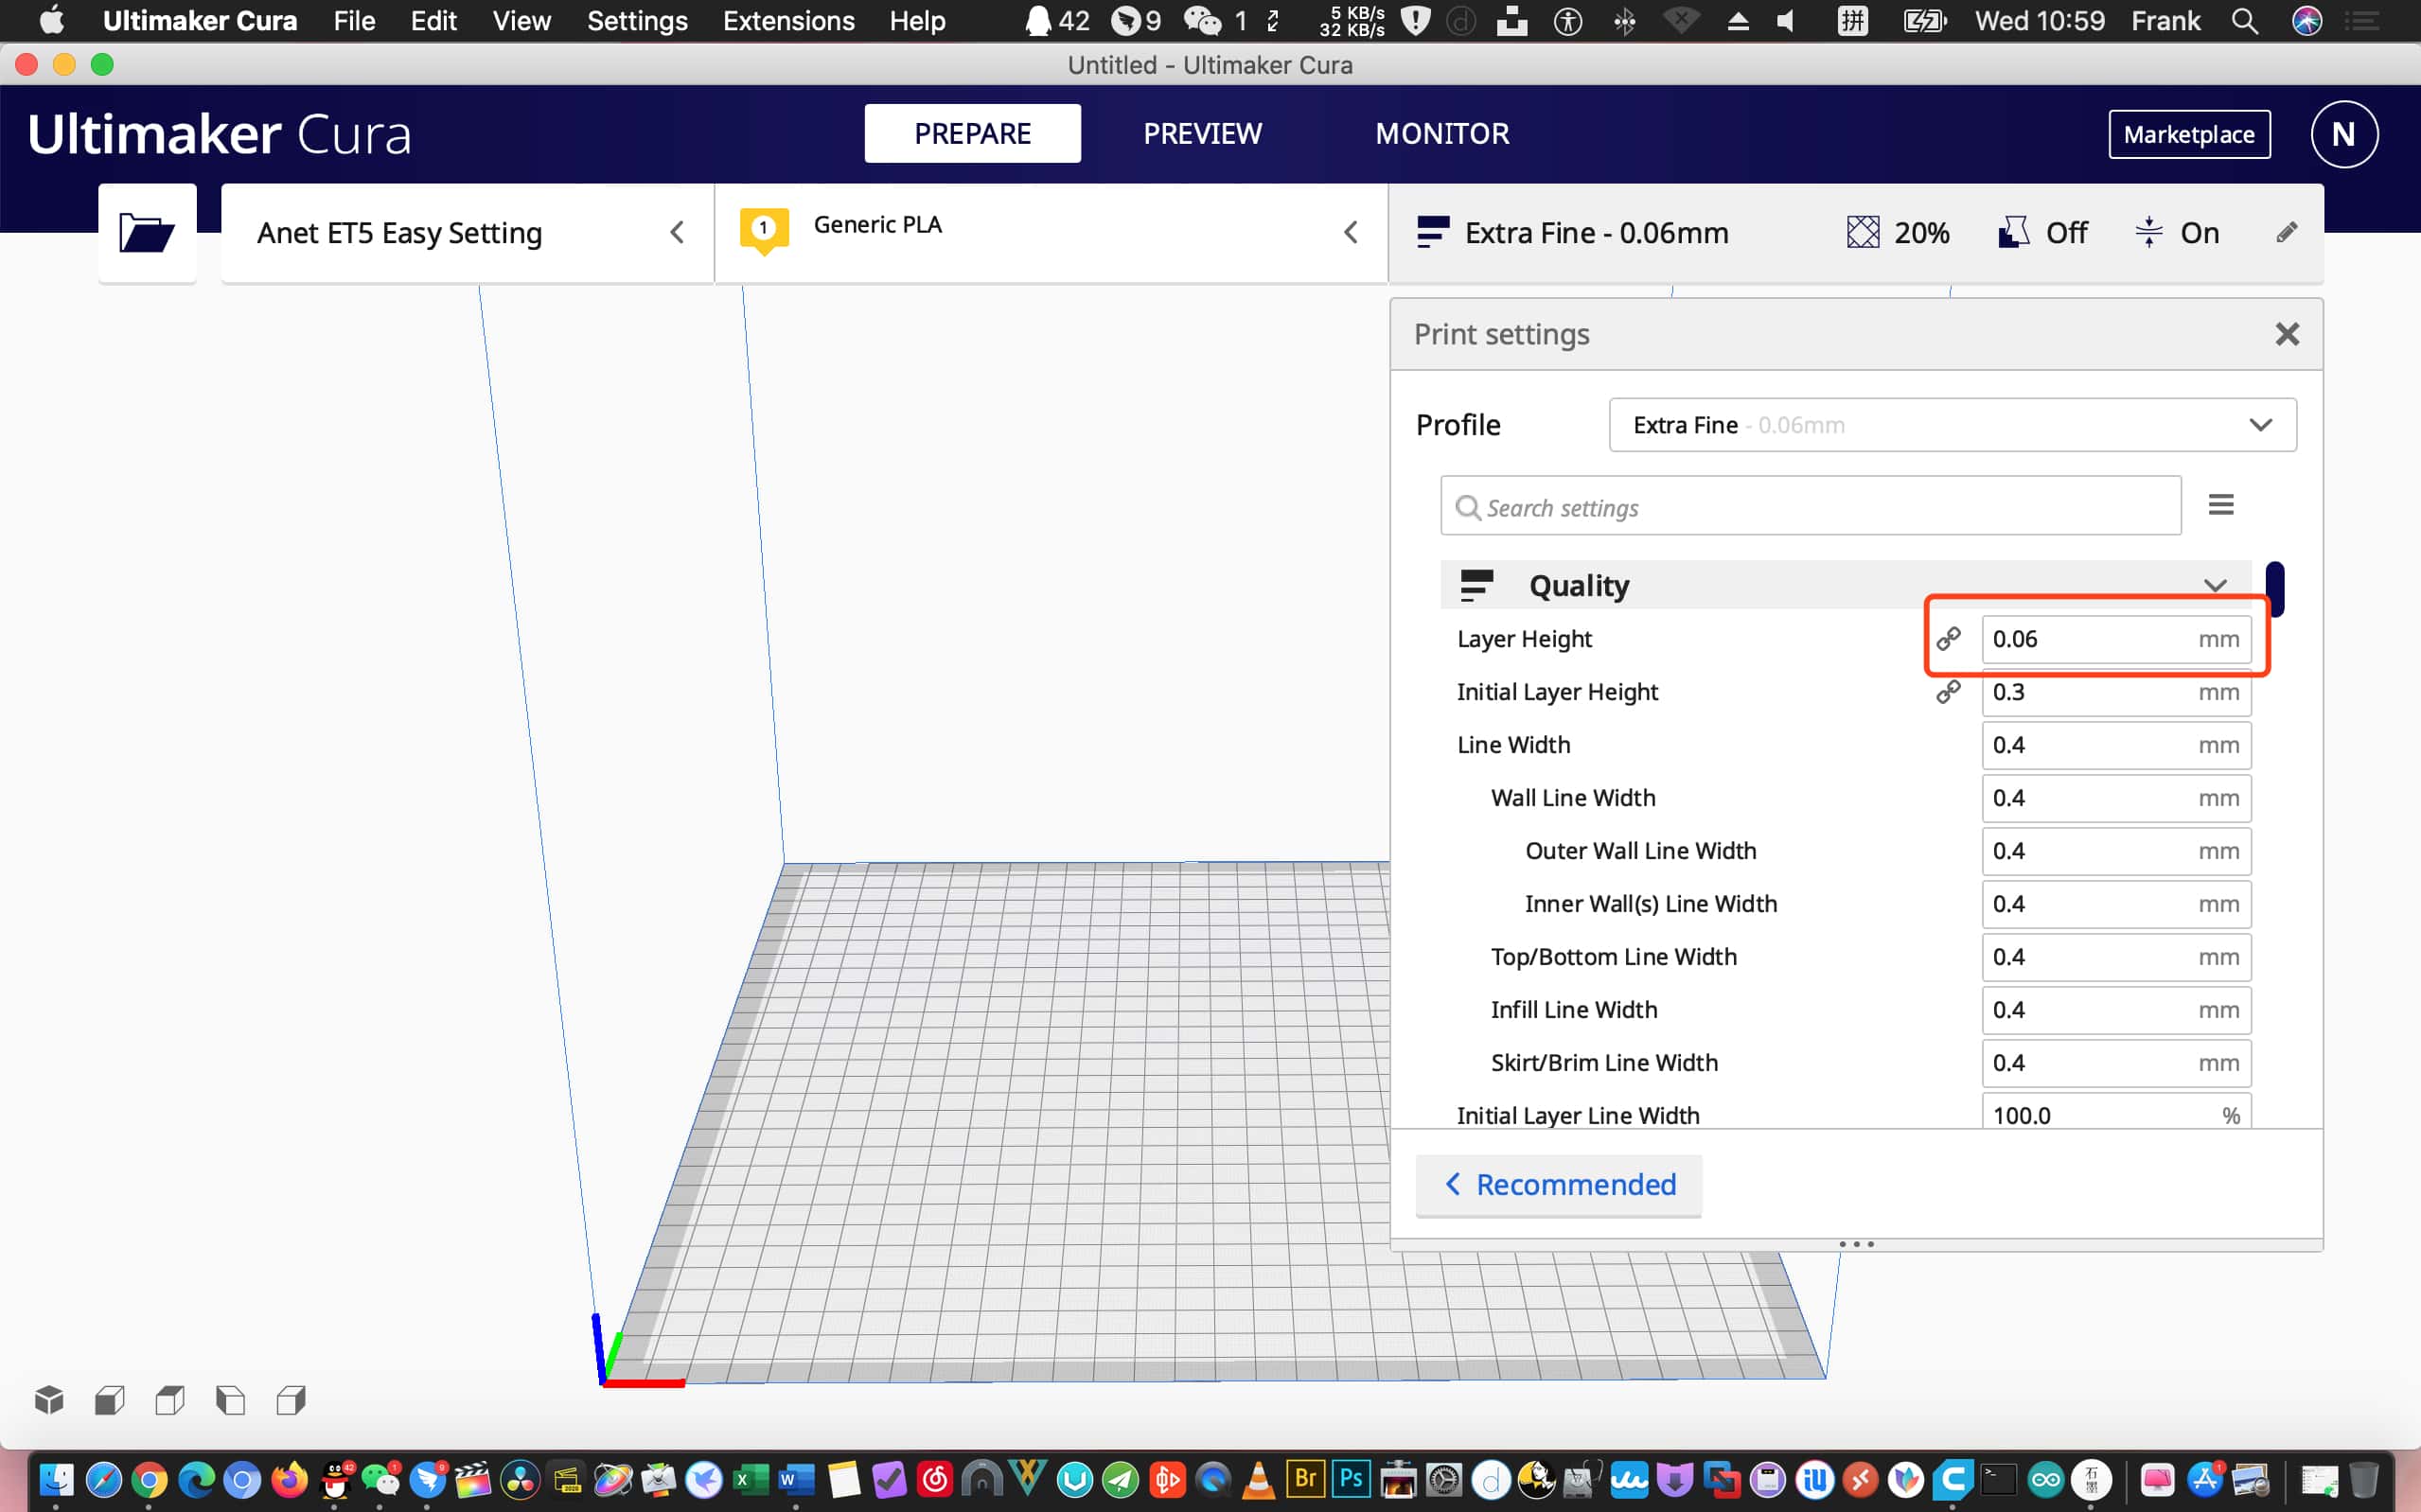
Click on pencil icon to enter advanced settings and set ”Layer Height” to 0.06 mm, the minimum value of layer height. The default value of layer height is 0.3mm and tends to result in ugly texture on printed 3D model. And other related values will automatically change according to changed layer height.
Note: the Cura 4.7.1 support search for settings. You can input words to find them.
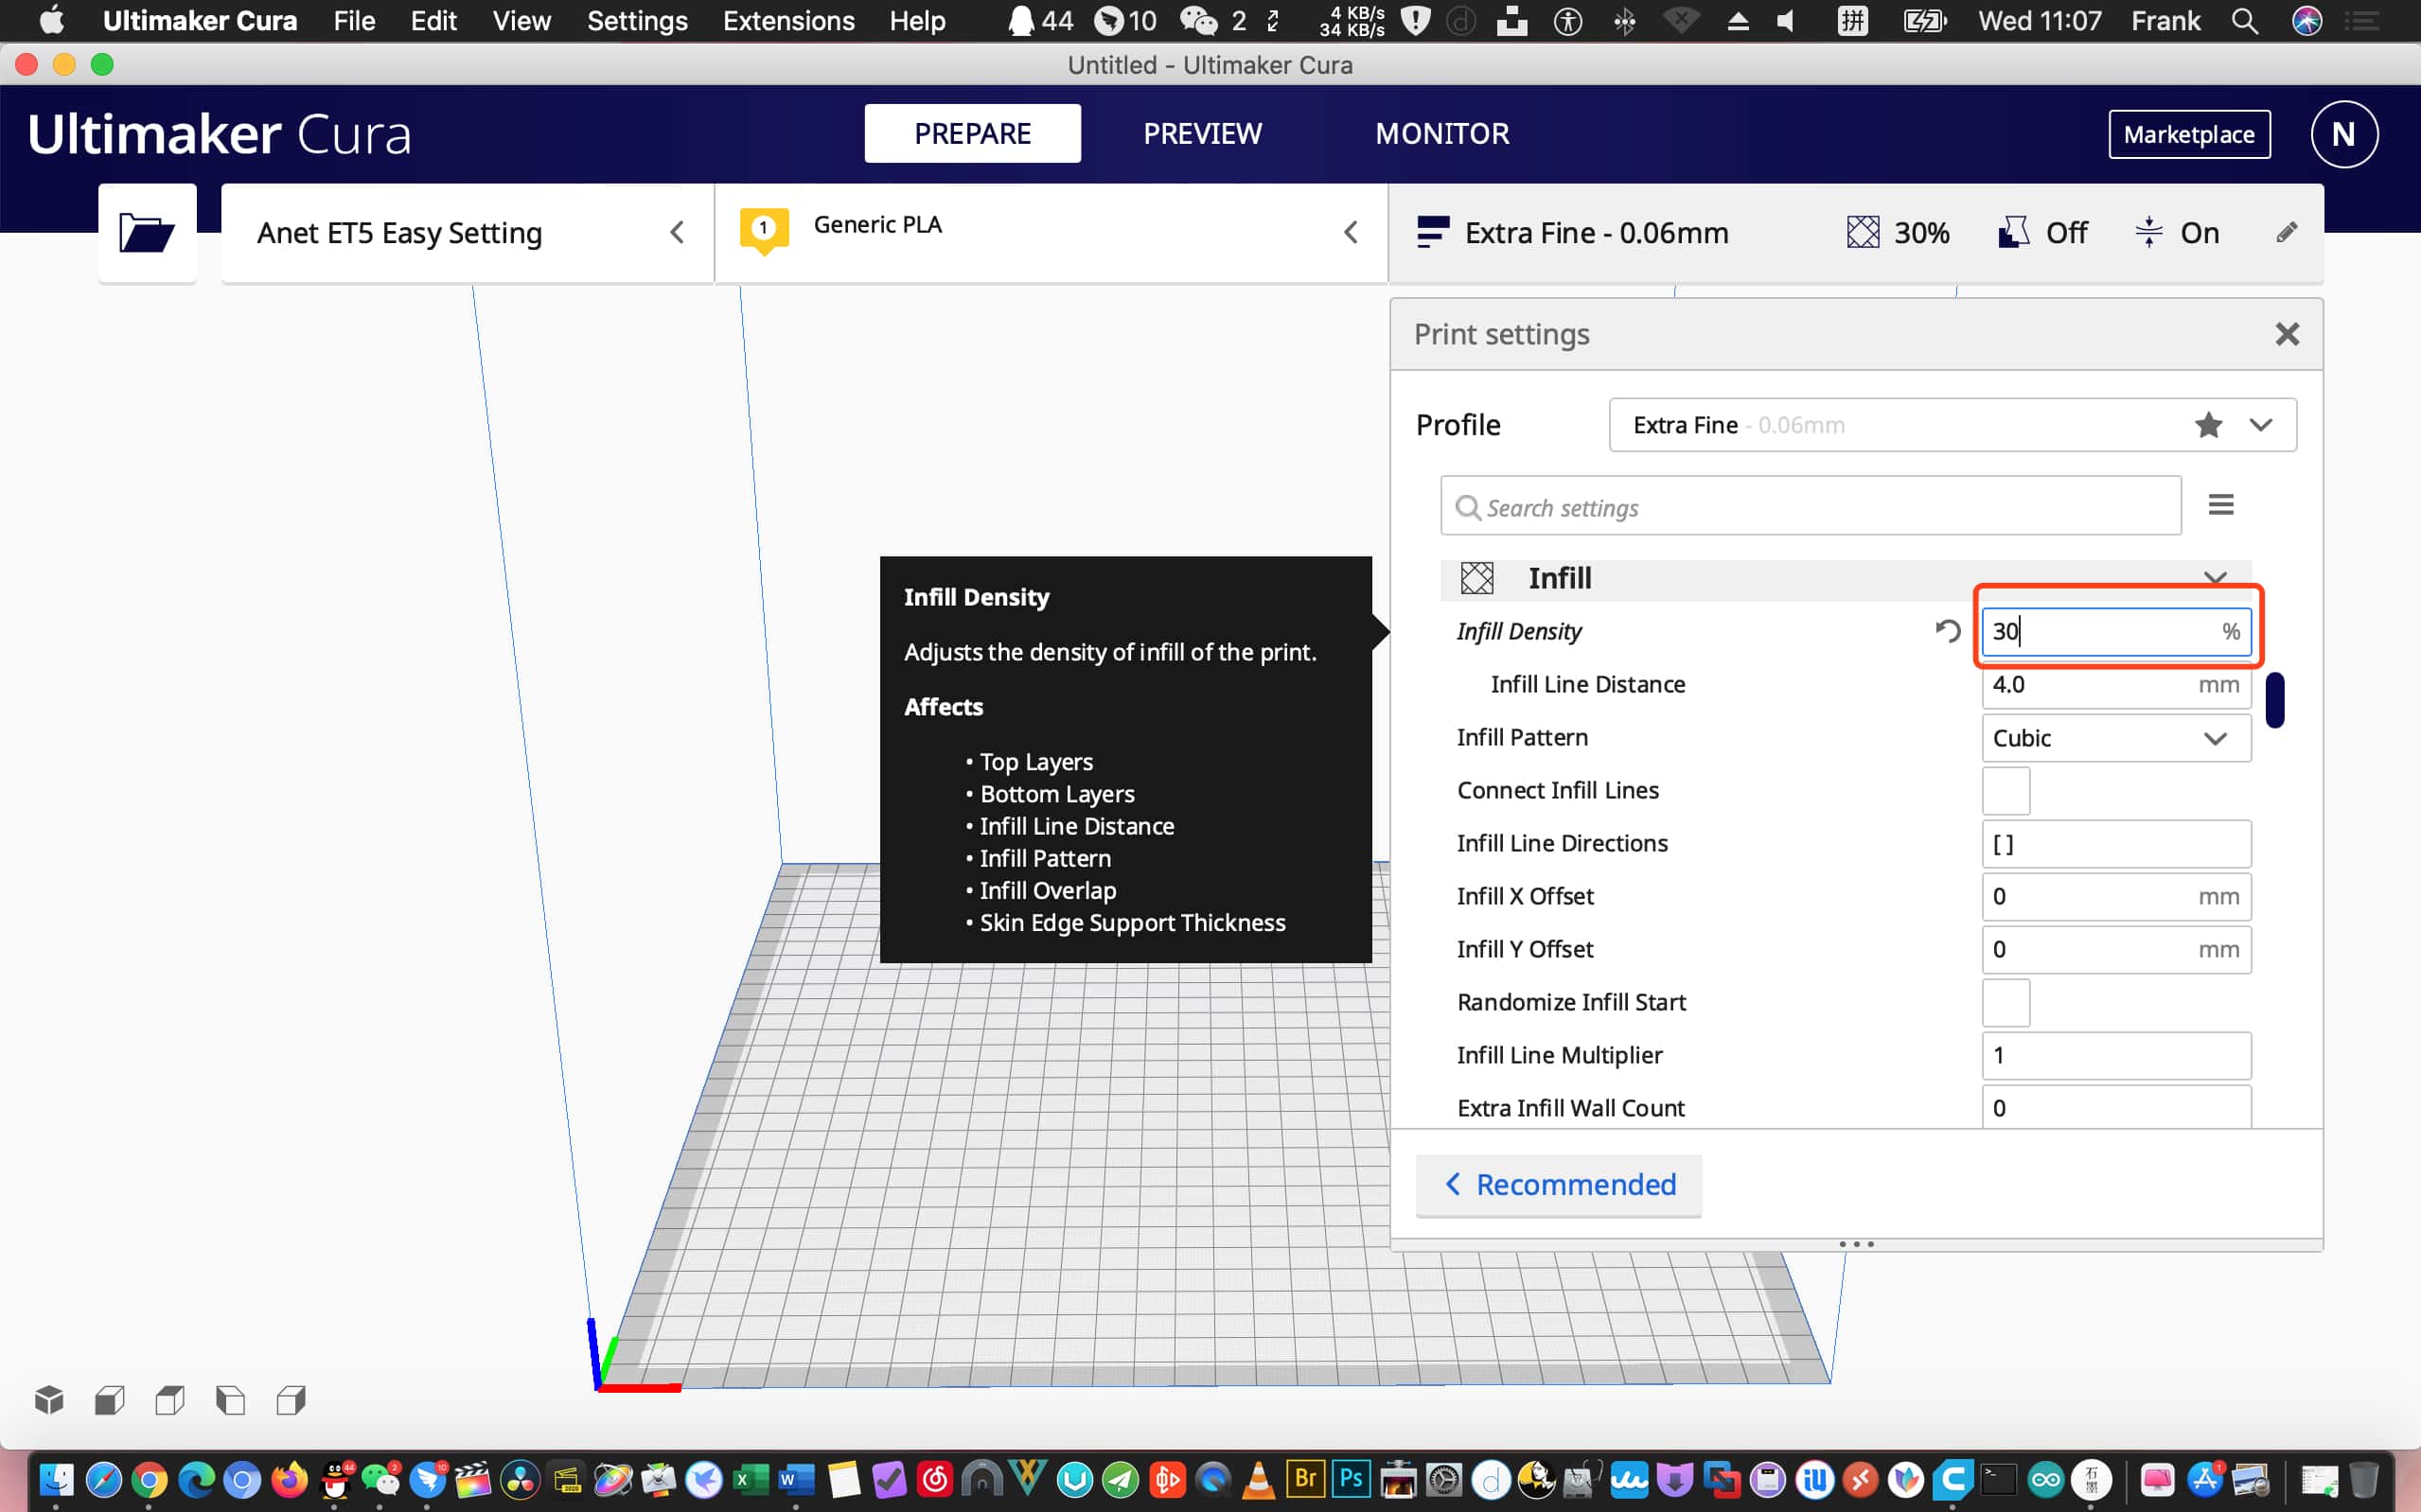
Search “Infill” settings and set “Infill Density” to 30% to enhance printing result. It won’t increase printing time and filament consumption. Or you can set infill density higher according to your demand.
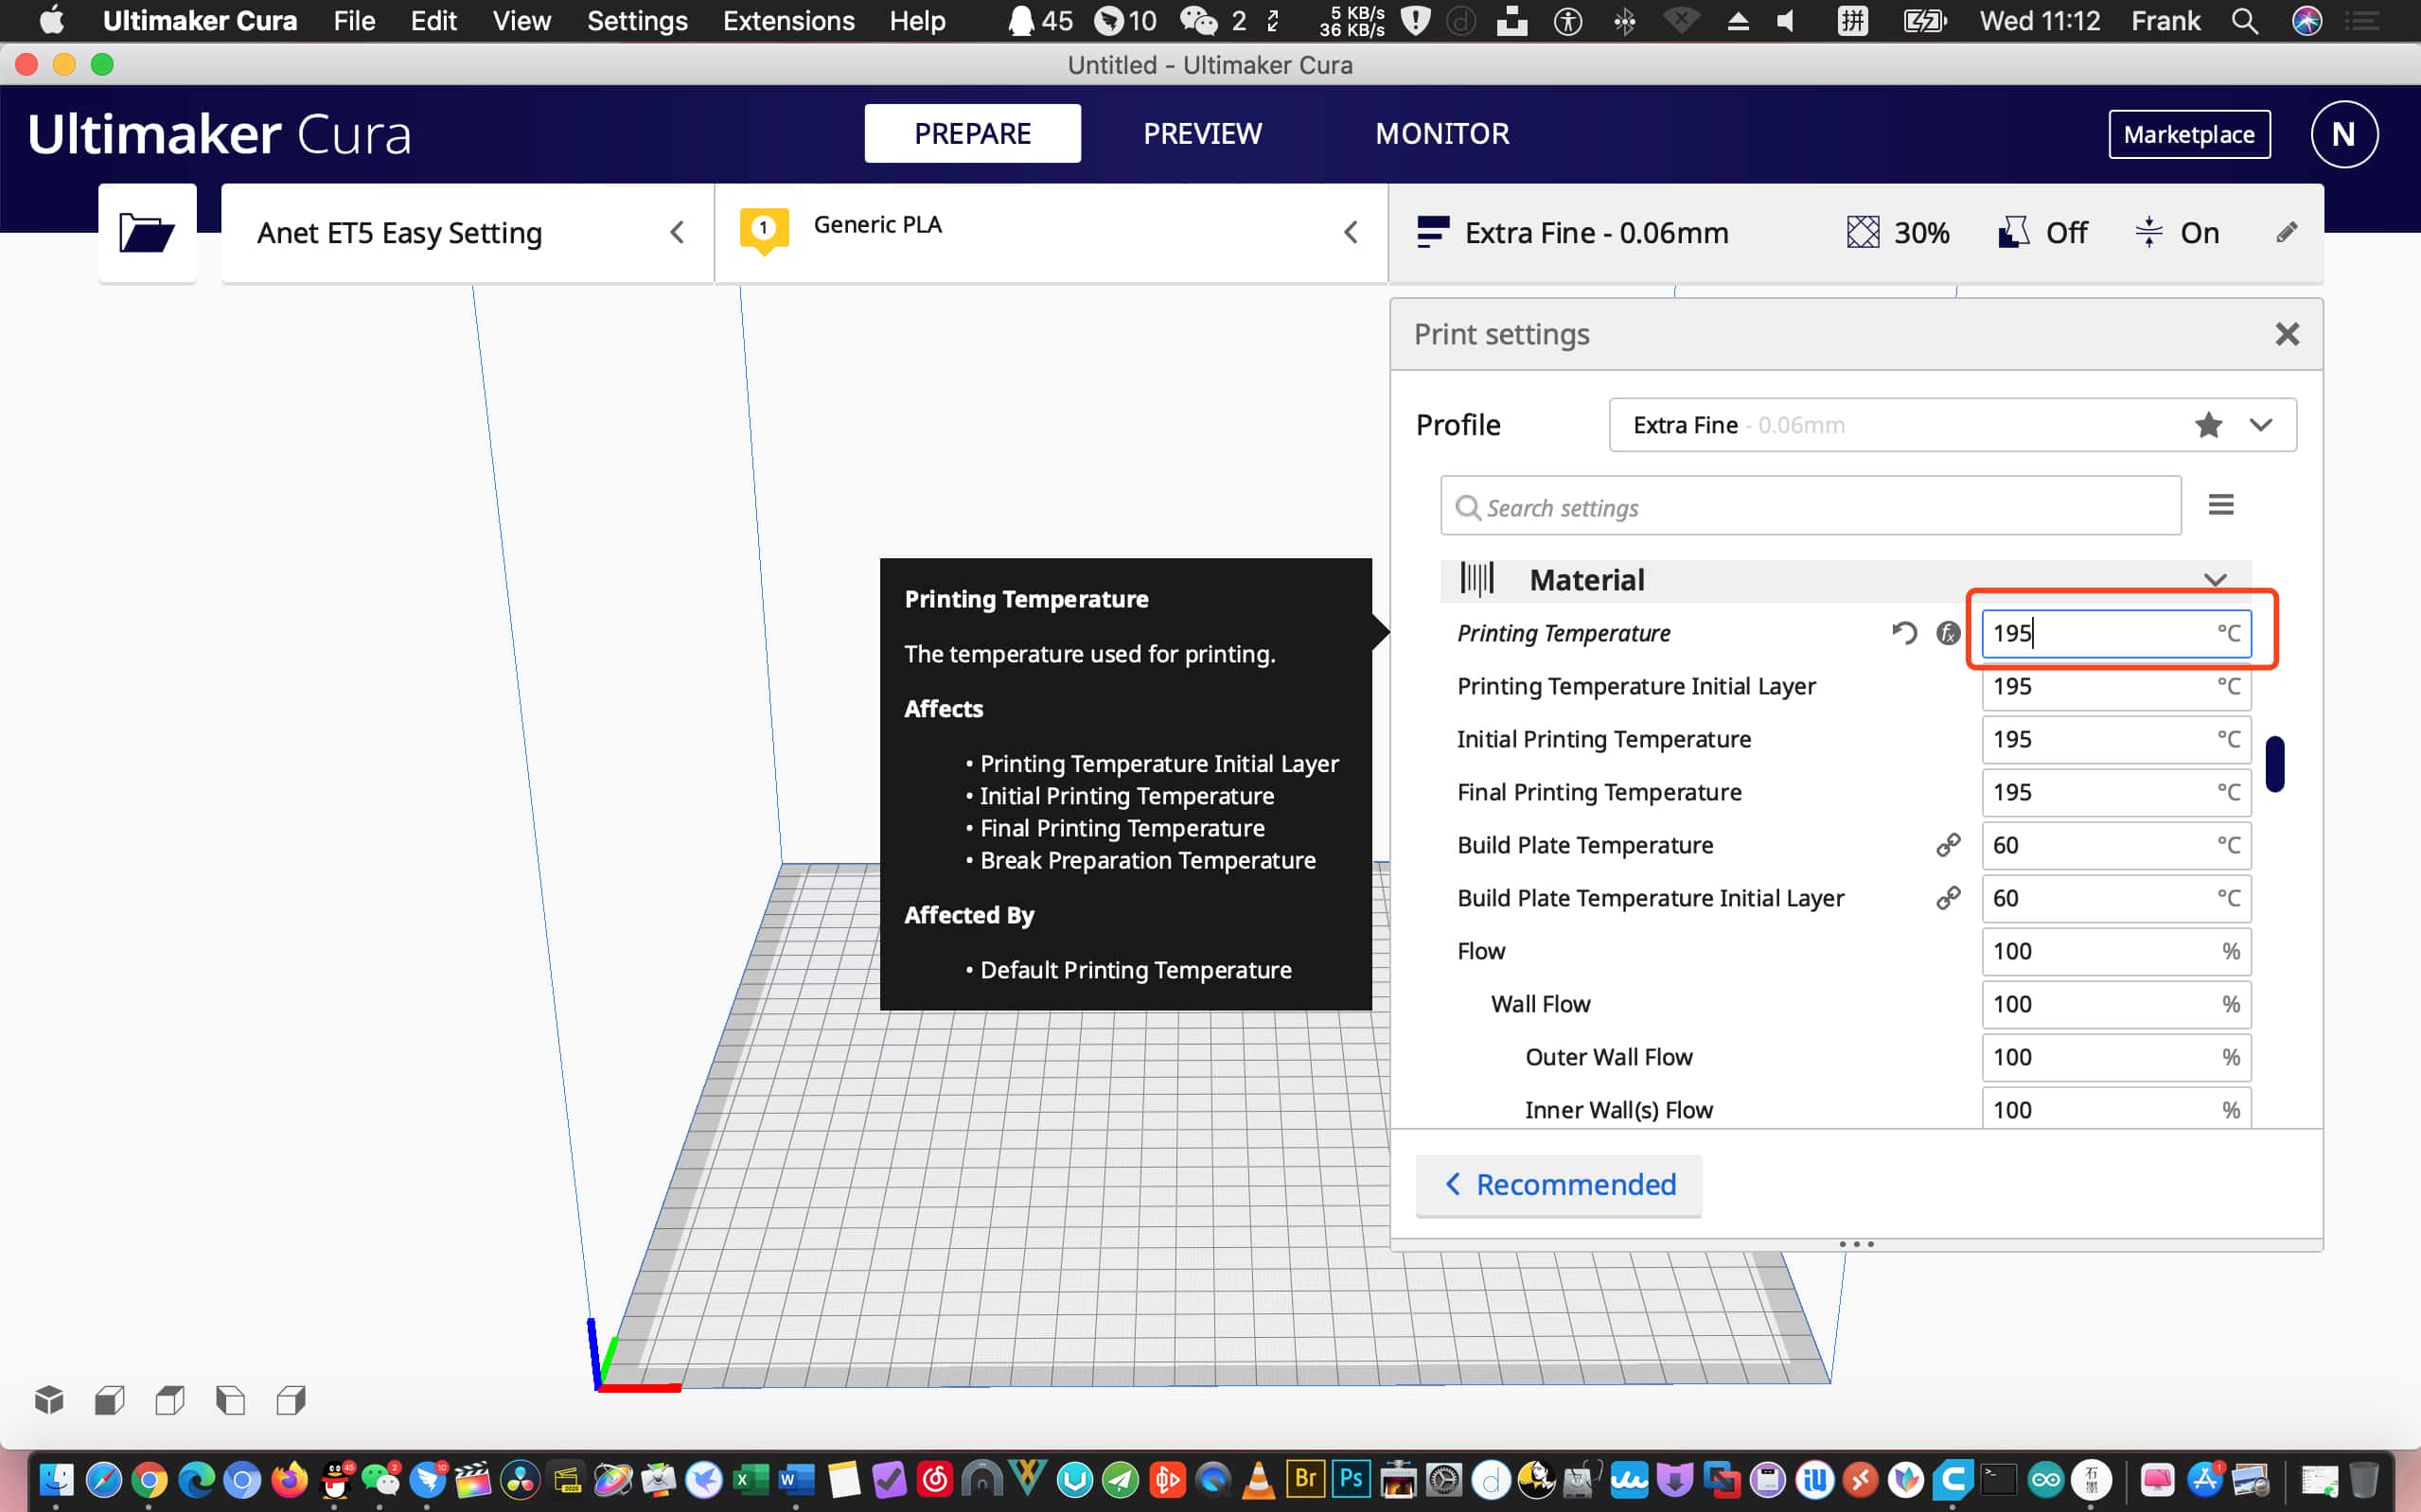
Search for “Material” setting and set “Printing Temperature” to 195 ℃. Lower printing temperature can avoid filament snag and improve 3D printing result. Different filaments have different printing temperature requirements. You can refer to filament tags to set printing temperature at the lowest among the recommended data.
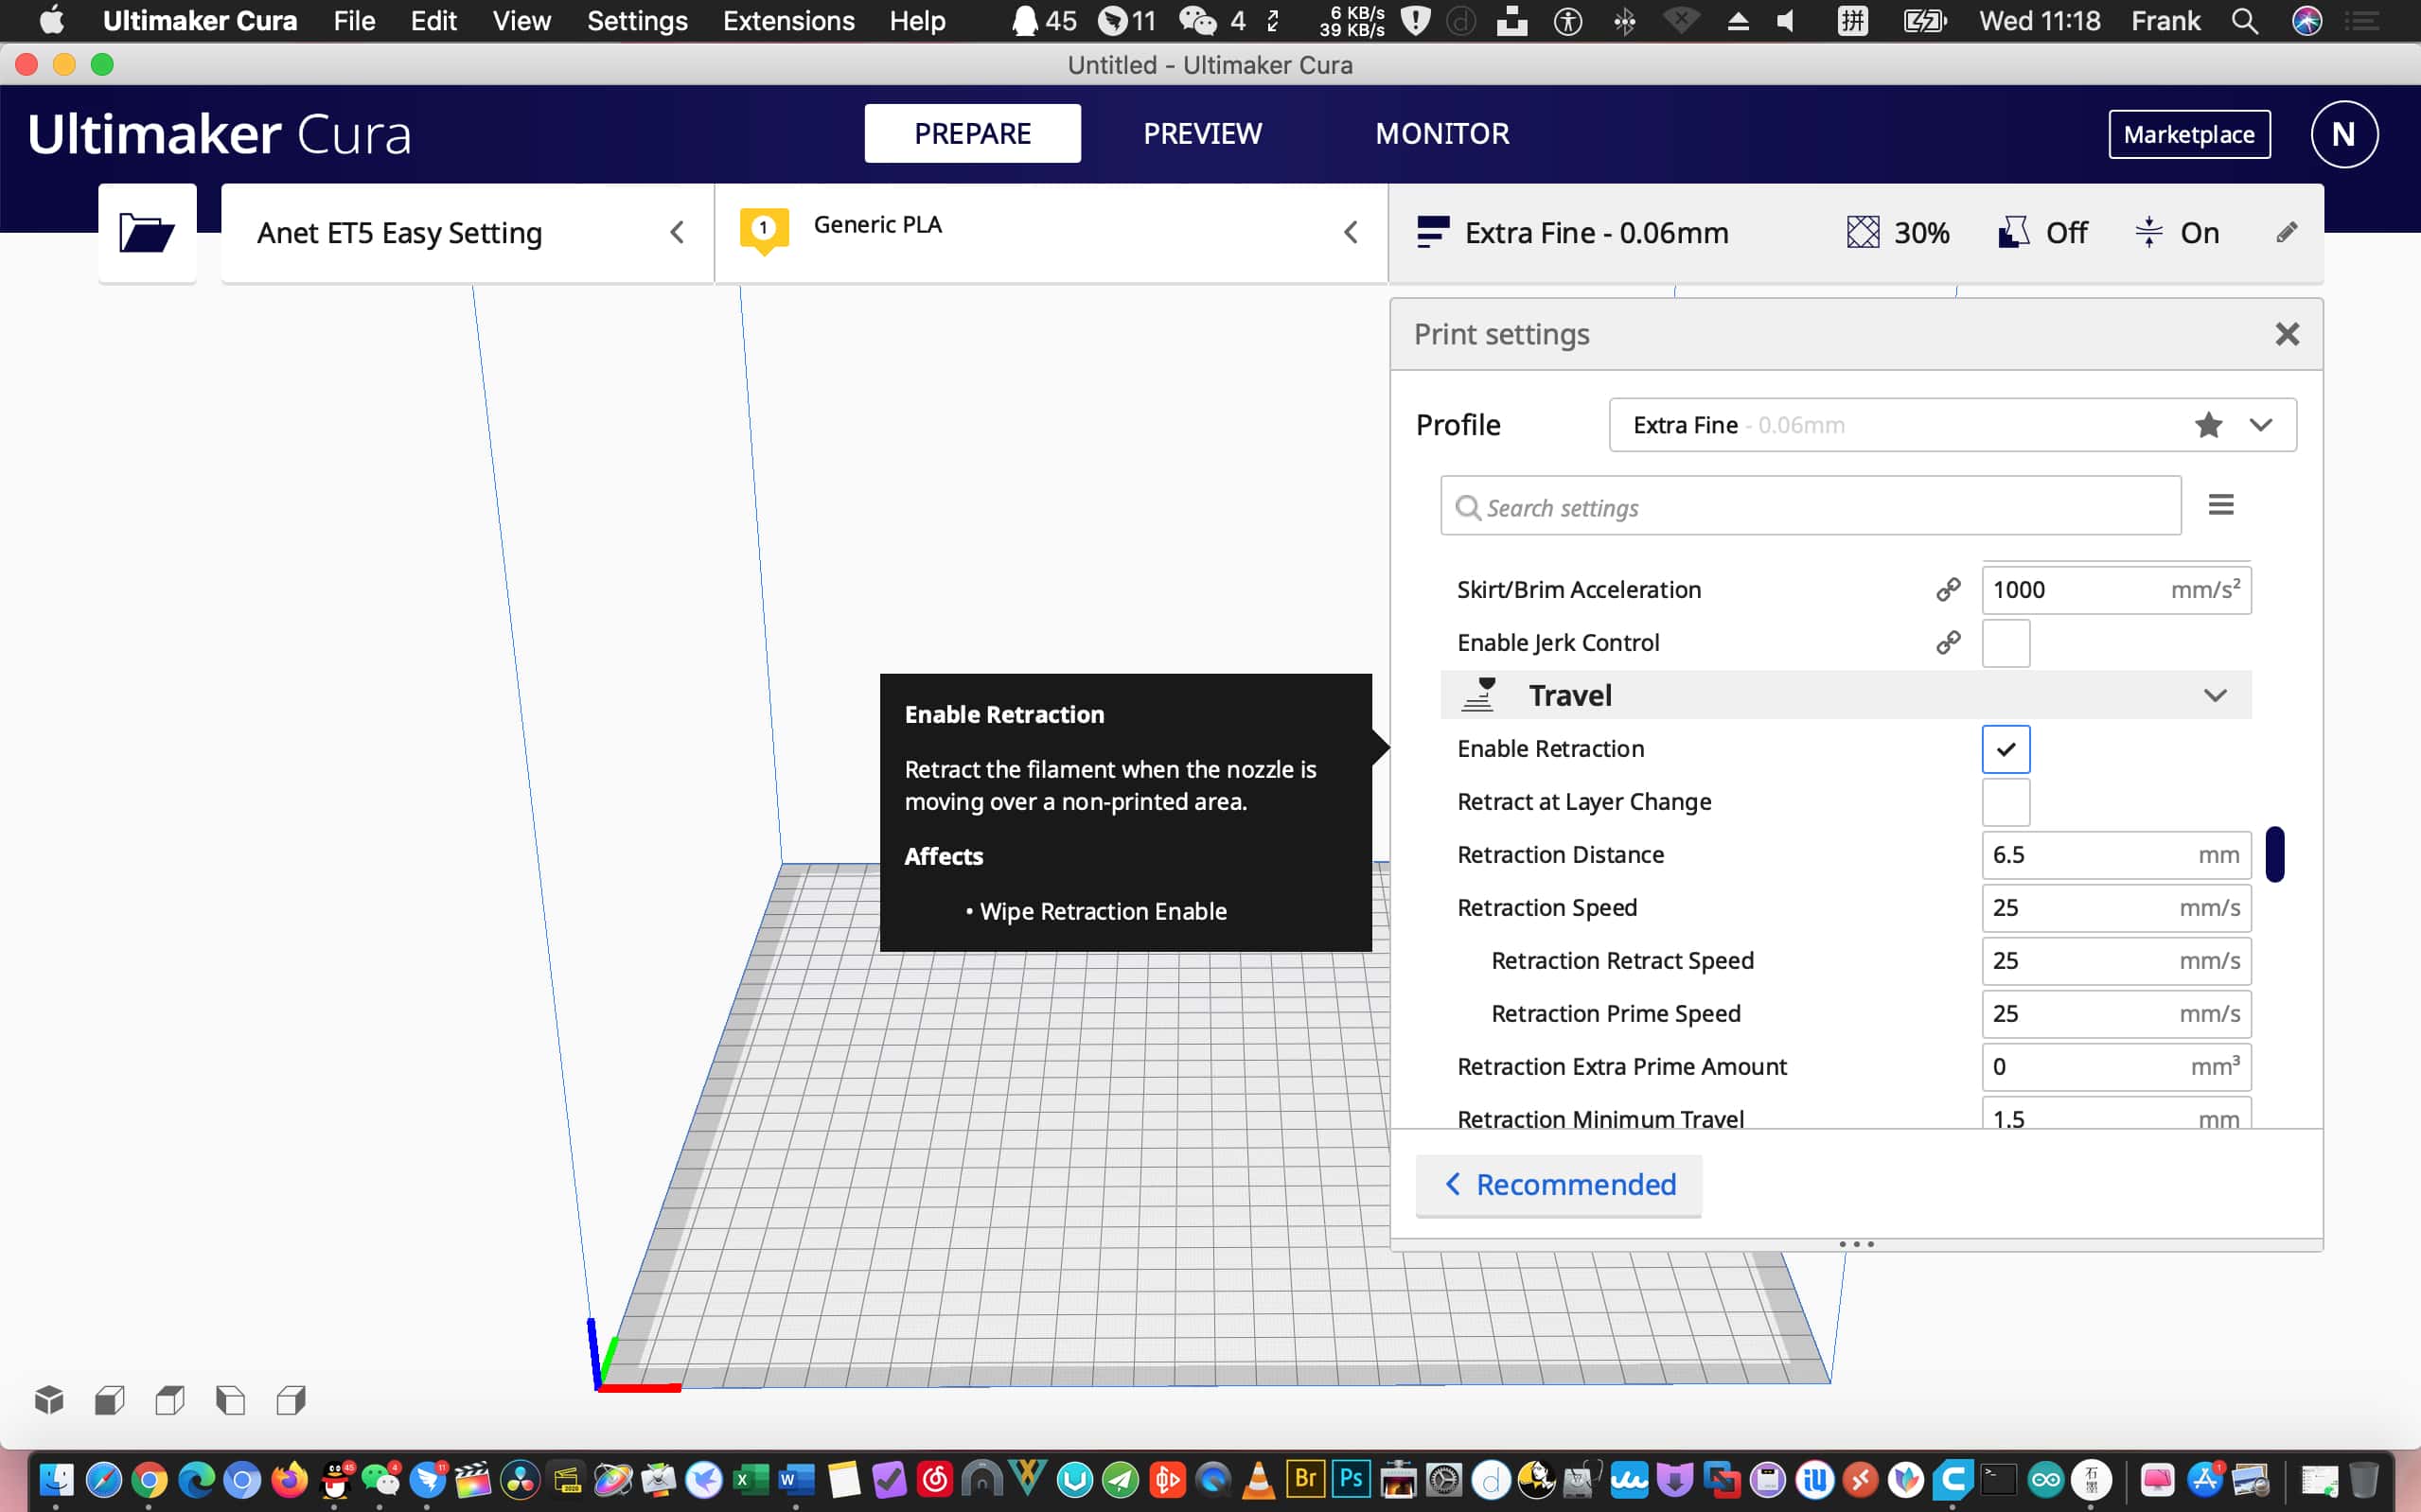
Input “Travel” and find related setting. Make sure “Enable Retraction” is applied. It’s necessary to avoid filament snag. Normally, it’s a default setting too.
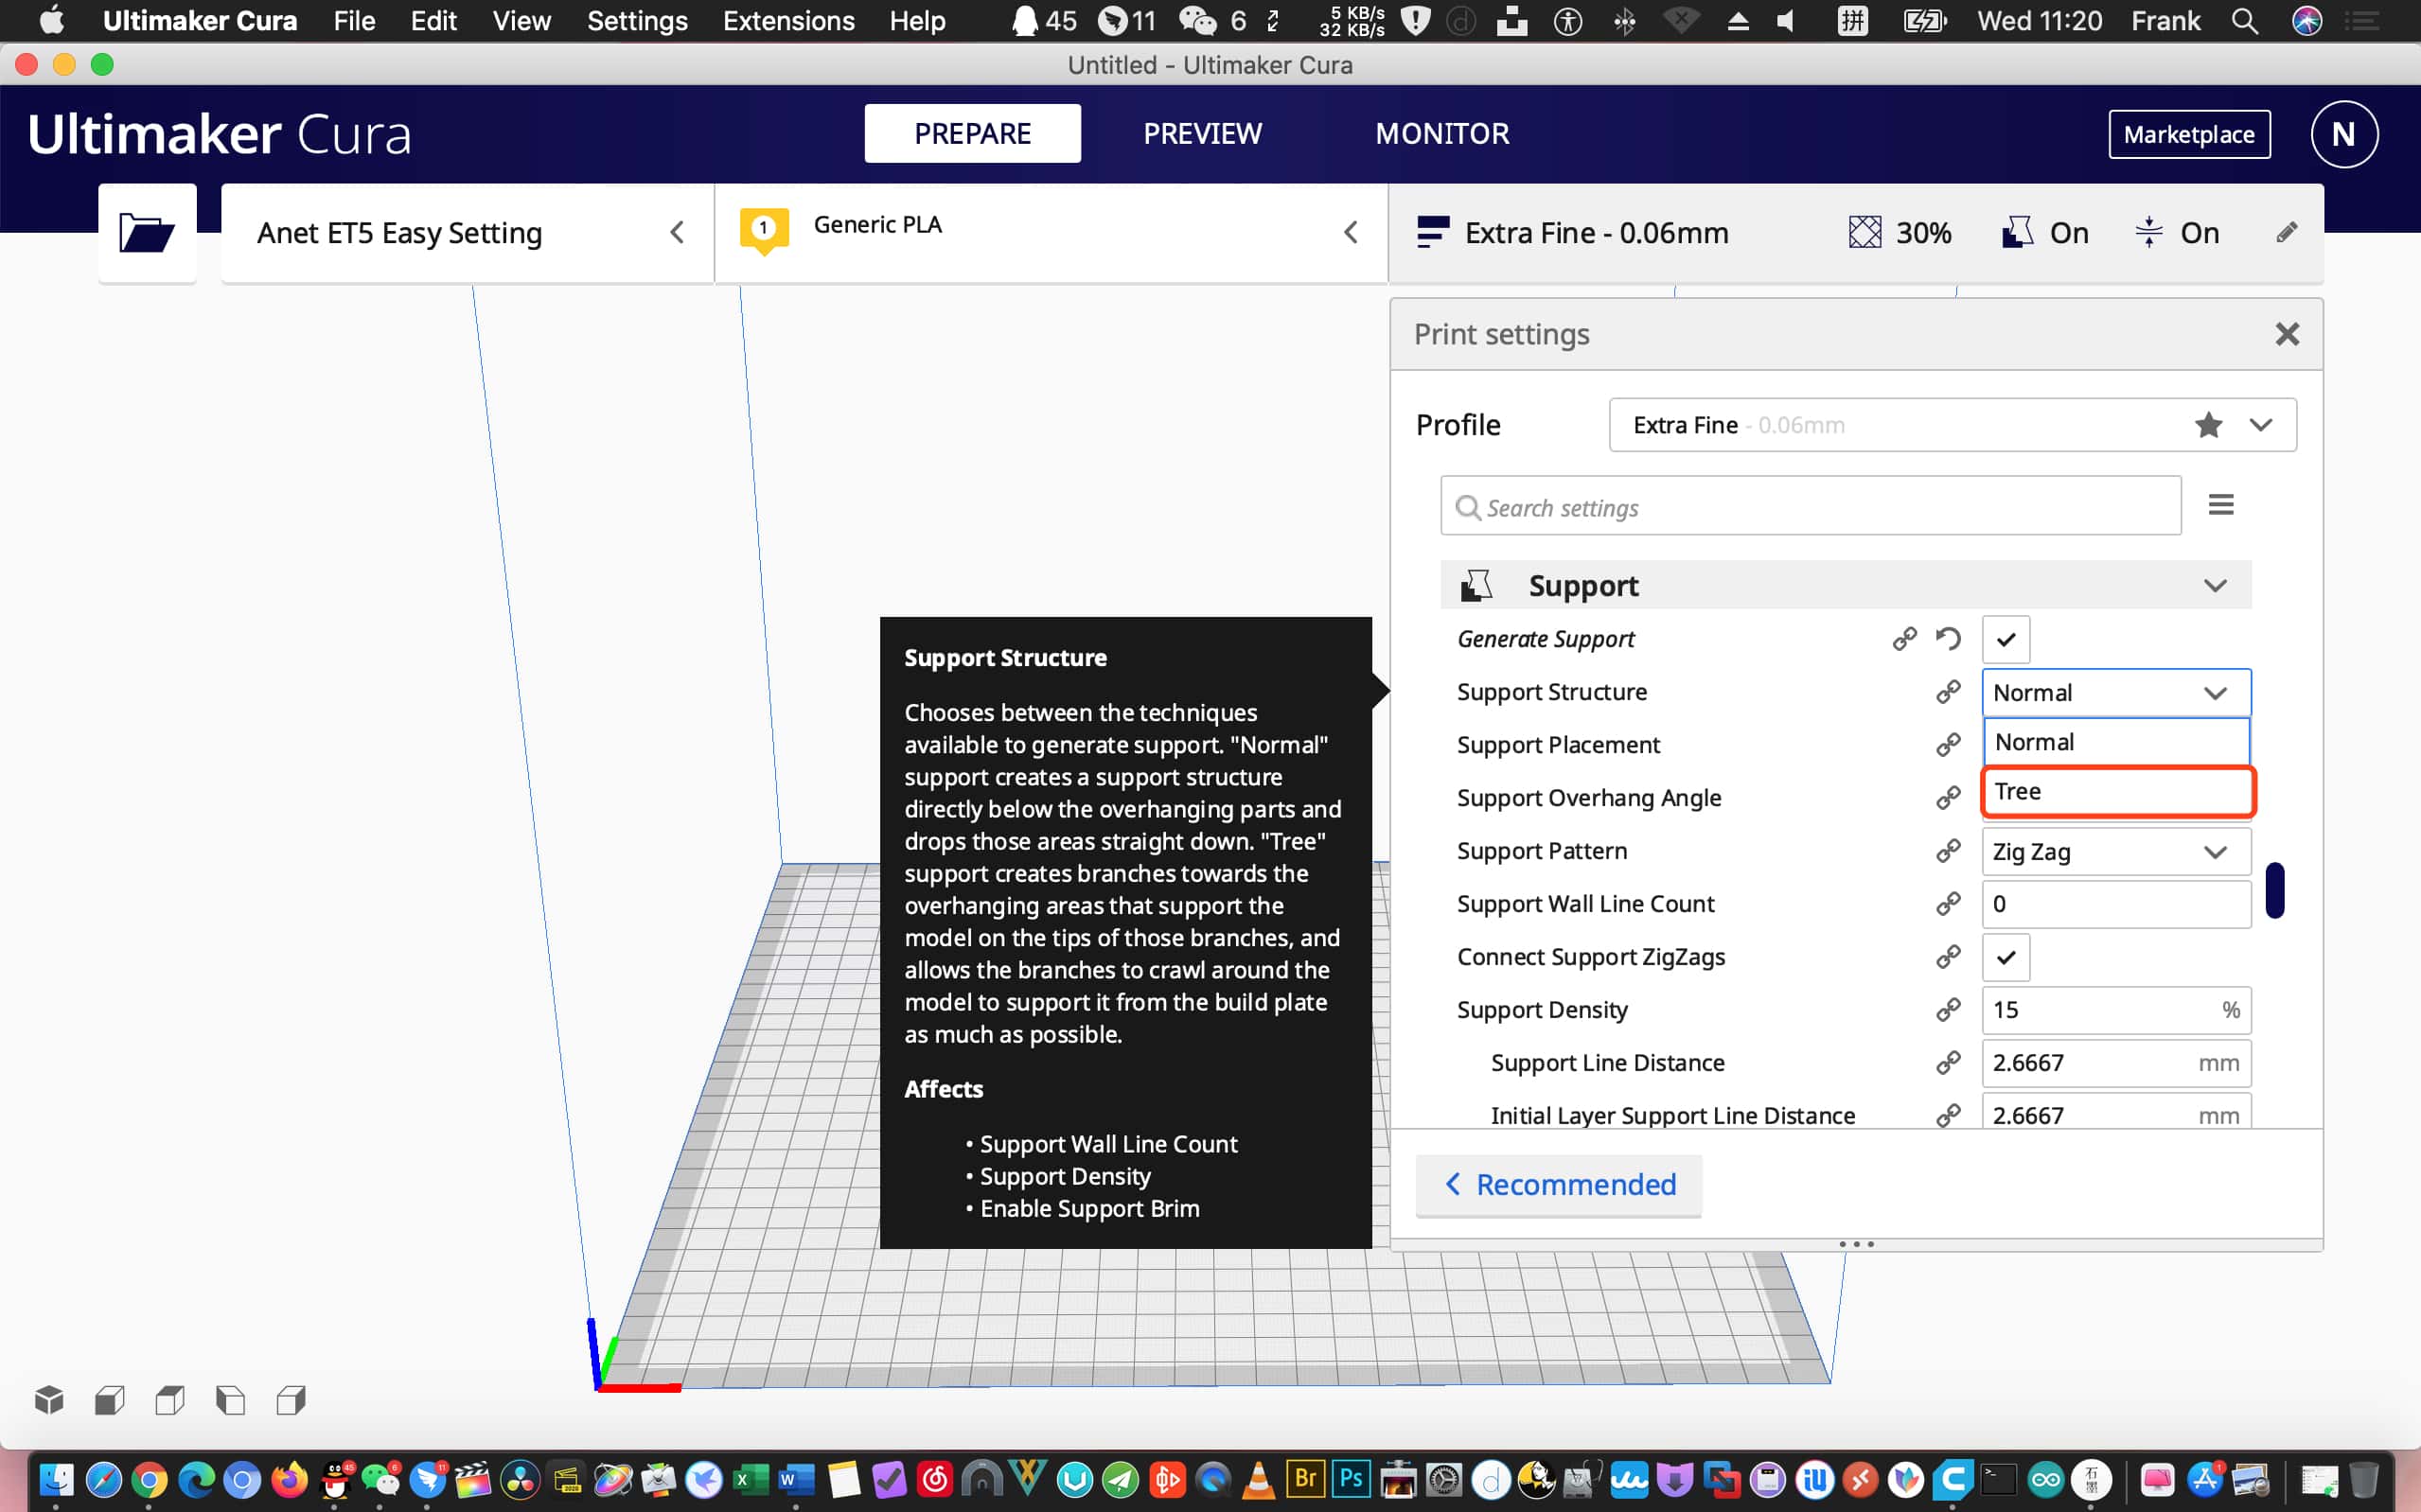
Search for “Support” and apply “Generate Support”, and set support overhang angle to “Tree” type. Tree support is a new feature that reduces support requirement for less filament consumption and printing duration in the new Cura 4.7.1. It also enhances surface neatness of a printed 3D model with the least support residue.
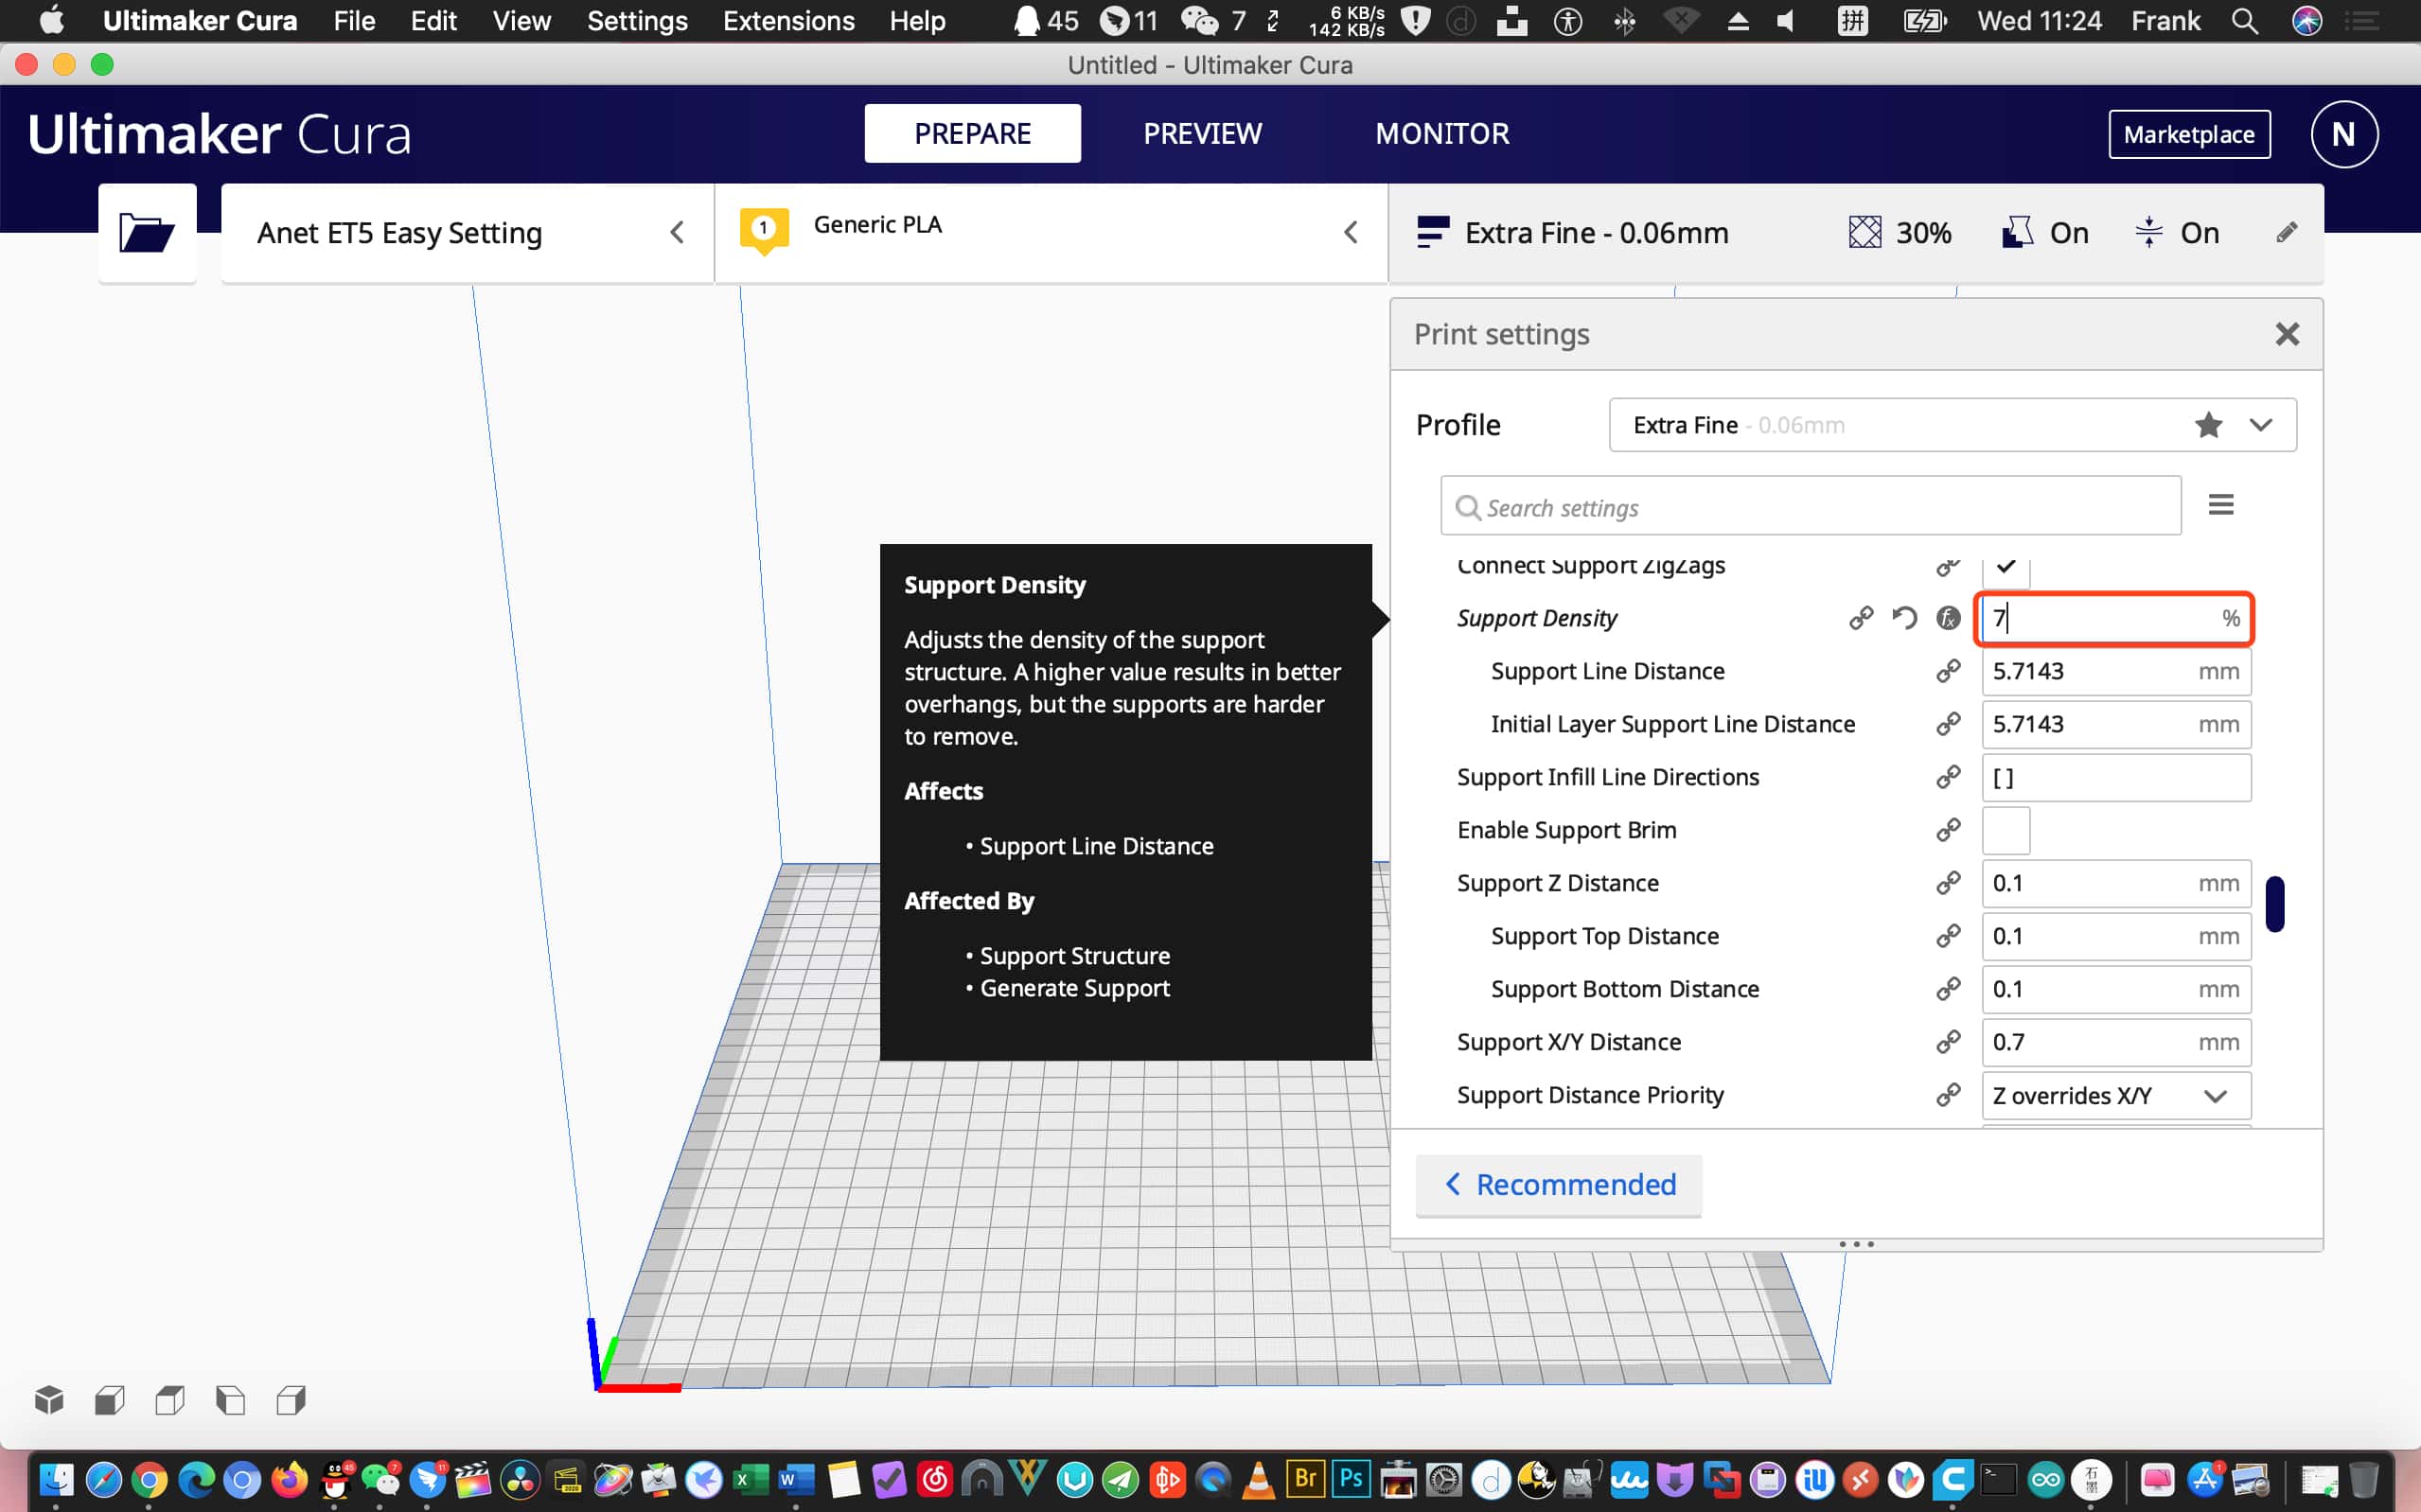
Find “Support Density” and set the value from the default 20% to 7%. It increases density discrepancy to 23% between the support and the model which we previously set the infill density to 30%.
Please be aware that there is only 5% density discrepancy between the default values of support and infill. It’s more likely to lead to problems to remove support and affect final outcome.
After setting is done, remember to cancel “Generate Support”. We only apply it when support is needed.
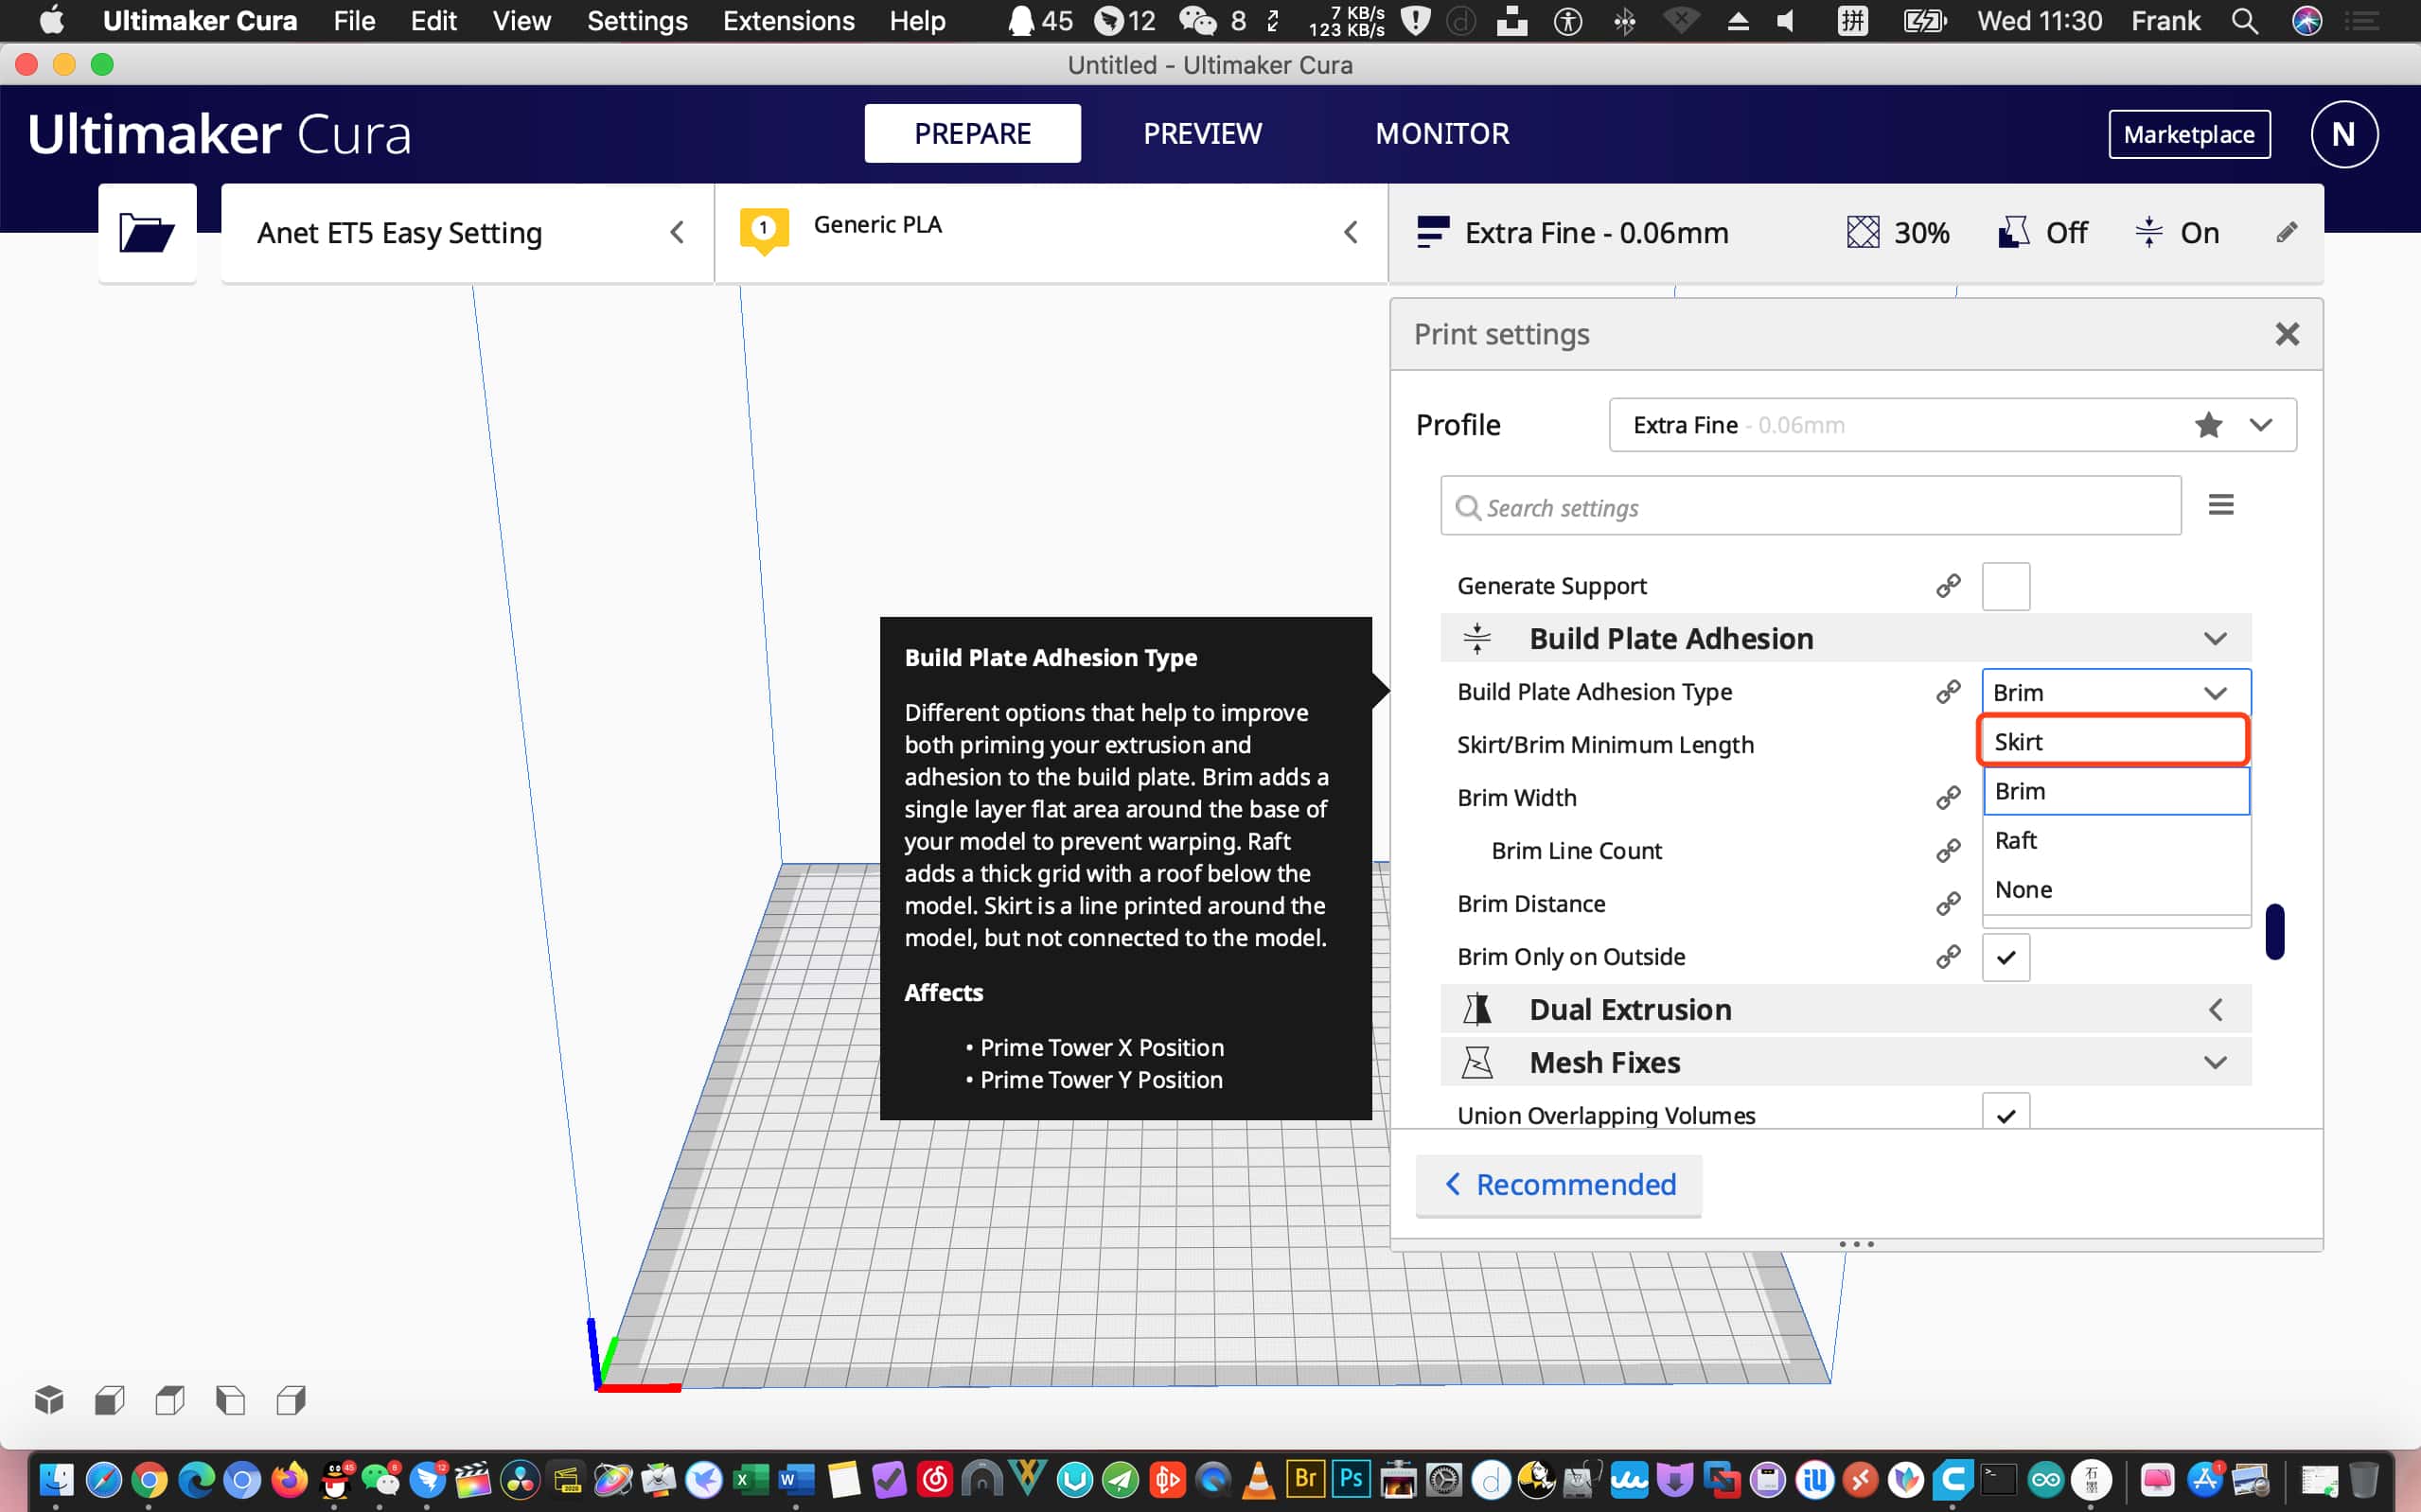
At the “Build Plate Adhesion” section, we can set “Build Plate Adhesion Type” to “Skirt”. A skirt like surrounding at the bottom of the 3D model will be printed. It’s thin like a skirt and connects little to the model bottom. It can be easily removed without affecting the smoothness of the edges of the printed 3D model. Additionally, you need apply some glue during heating the build plate to avoid warp printed 3D model.
If you want to print a foldable pumpkin on FAB365 for Halloween, you should follow official recommendation to set adhesion type to “Raft” because the 3D model has small area that contacts the build plate.
Below are conclusions on all settings.
- Select “check all” and apply advanced setting.
- Set “Layer Height” to 0.06 mm.
- Set “Infill Density” to 30%.
- Set “Printing Temperature” to 195 ℃.
- Make sure “Enable Retraction” applied.
- Set support overhang angle to “Tree”.
- Set “Support Density” to 7%.
- Set “Build Plate Adhesion Type” to “Skirt”.
Don’t forget the ninth step, set printing speed to 80% or lower after printing started. It will further enhance printing result when a low printing temperature is set in previous procedure. You can find no trace of layer lines on the surface of a low speed printed 3D model. Thus the model looks more gloss and has a relatively strong quality. Low speed printing works well for both simple models and complex models.
If you don’t want to go through above procedures, you can also apply “Import” in “Manager Profiles” section and upload below file into Cura.
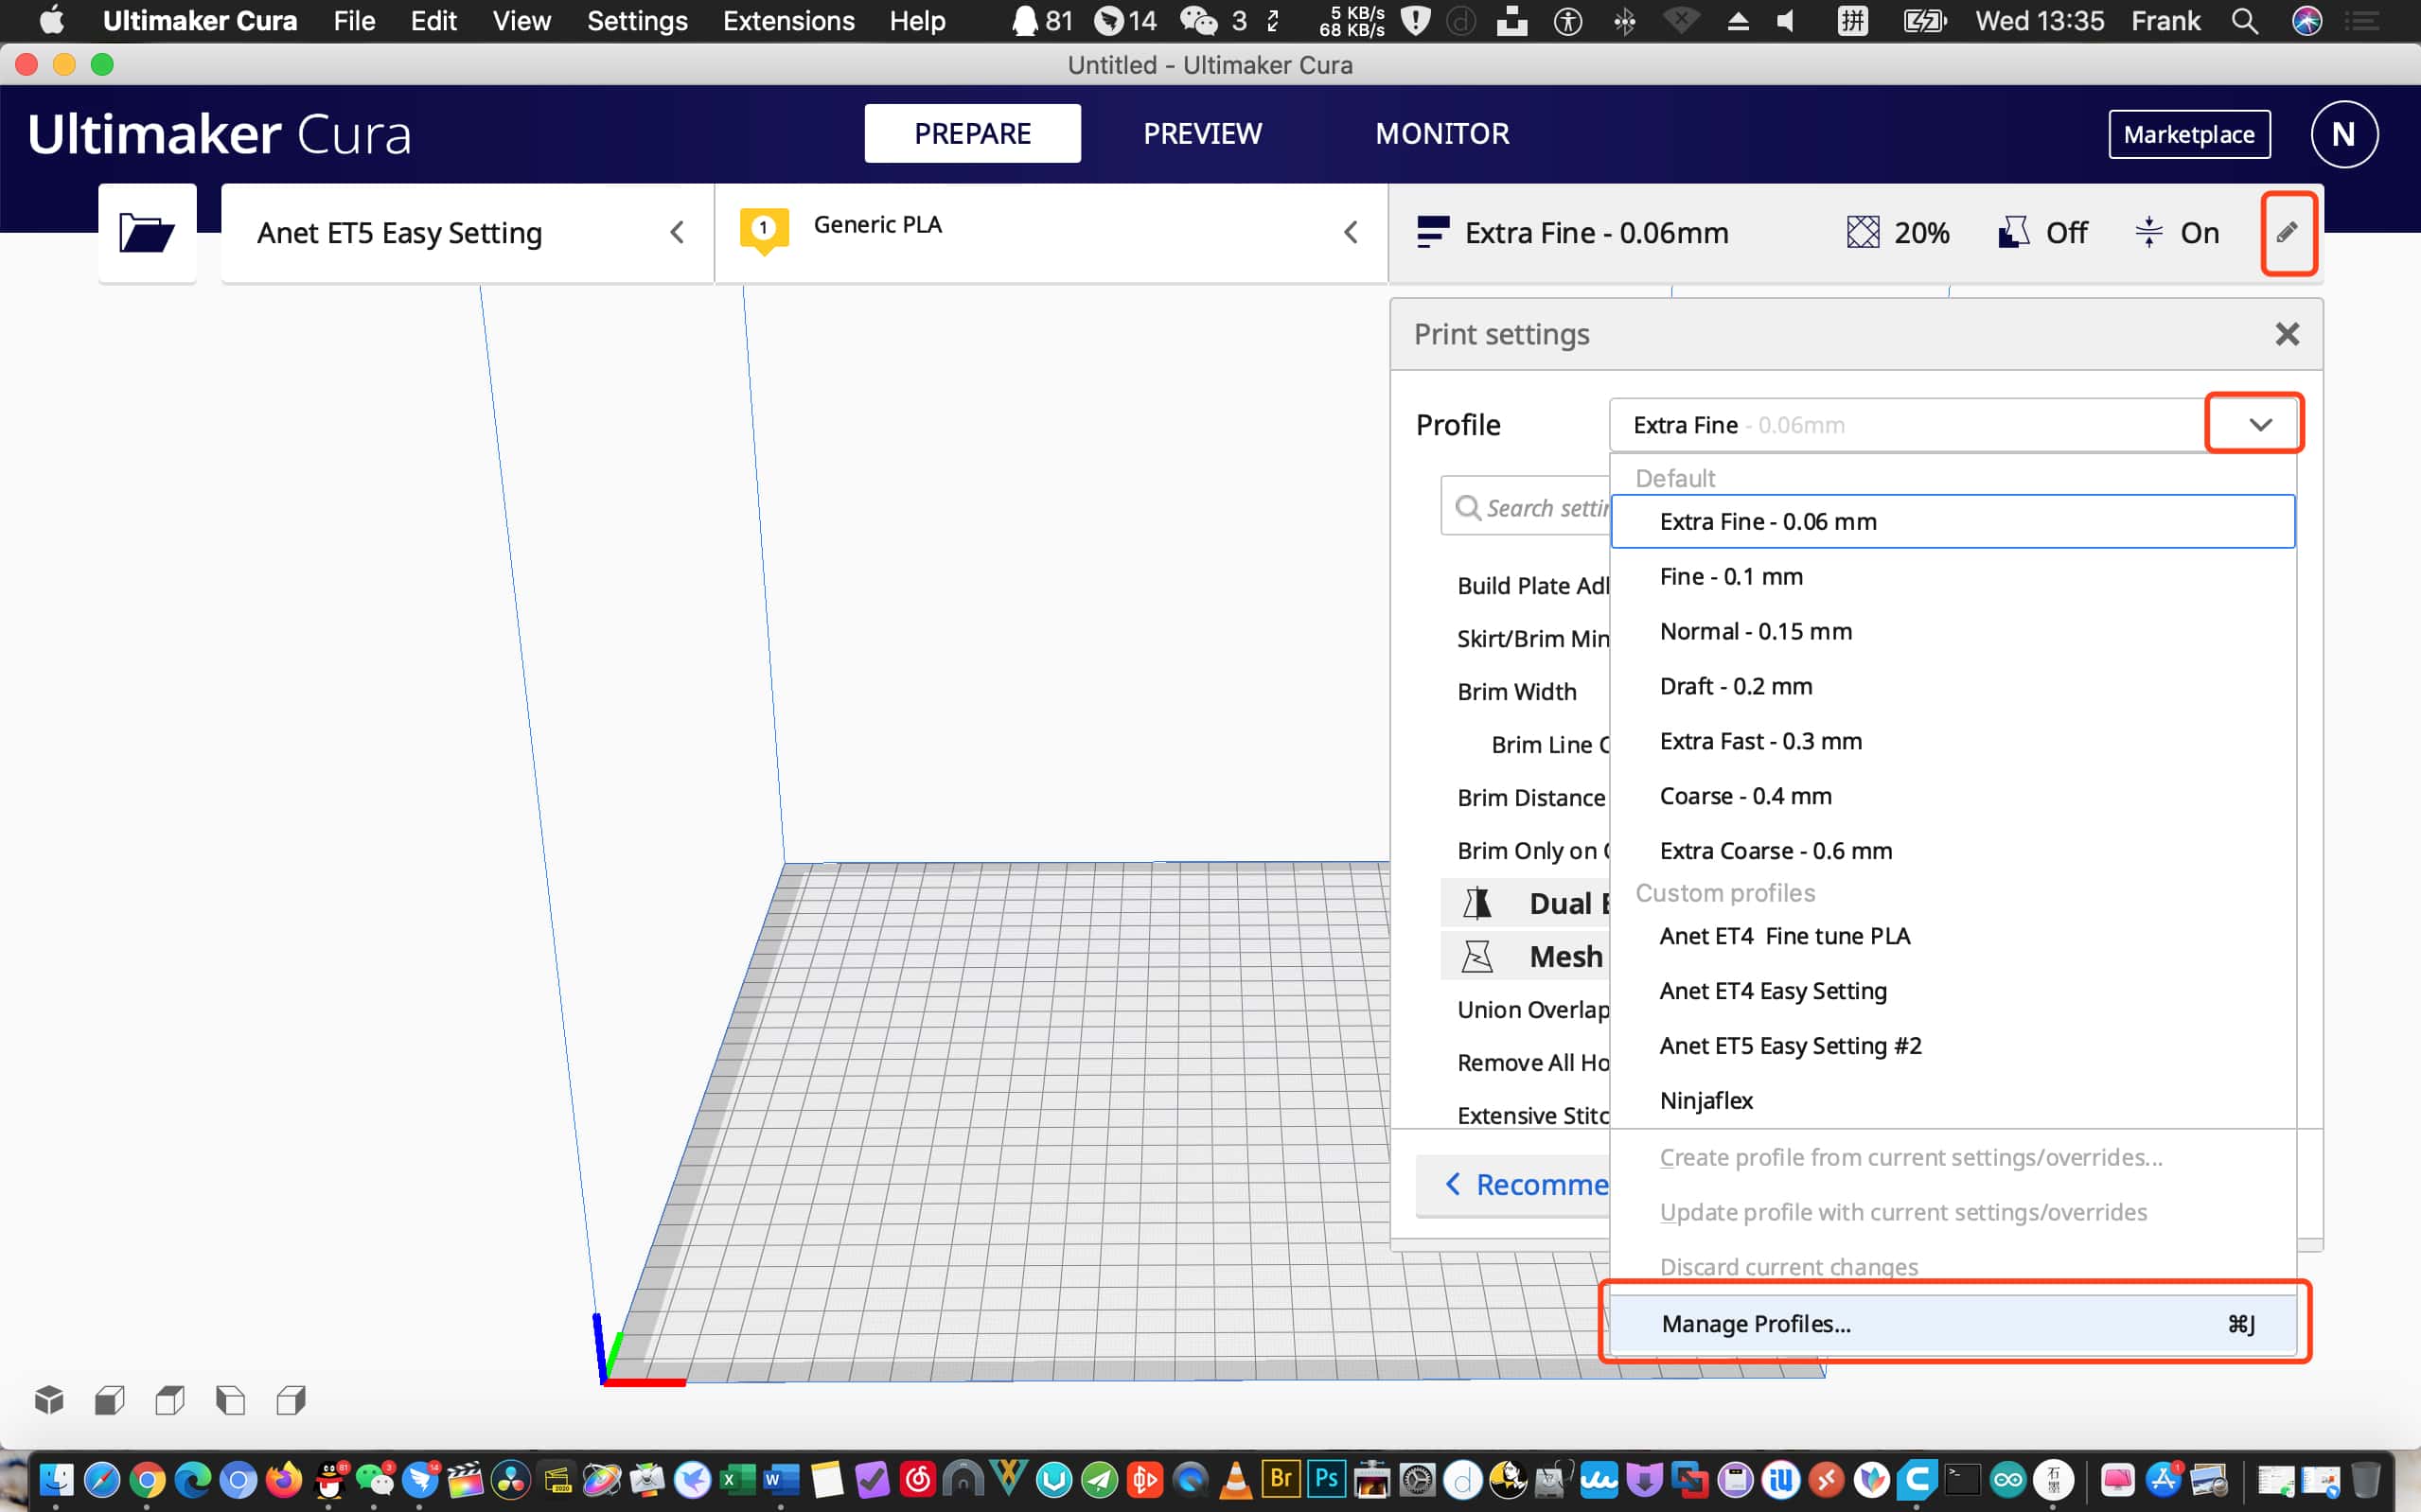
Cura Setting File:
https://drive.google.com/file/d/1cFxsy1Dkh055zM8h7CIcUAdKvwHGh5UY/view?usp=sharing
Note: the setting file only suits ET5, ET5X or ET5 Pro 3D printer that uses PLA filament.
After all settings are done, you should choose a top quality filament to ensure better 3D printing result.
Low quality filament tends to break and will result in failed printing due to filament jamming or tangling.
Different filaments suit different printing temperatures. It’s recommended to set printing temperatures at 200-205 ℃ for PLA filaments that tagged printing temperature among 200-220 ℃. For ABS filament or other kinds, please test out the most appropriate printing temperature by yourself.
We follow above Cura setting recommendations and printed a Spider Man. Let’s see the final outcome!
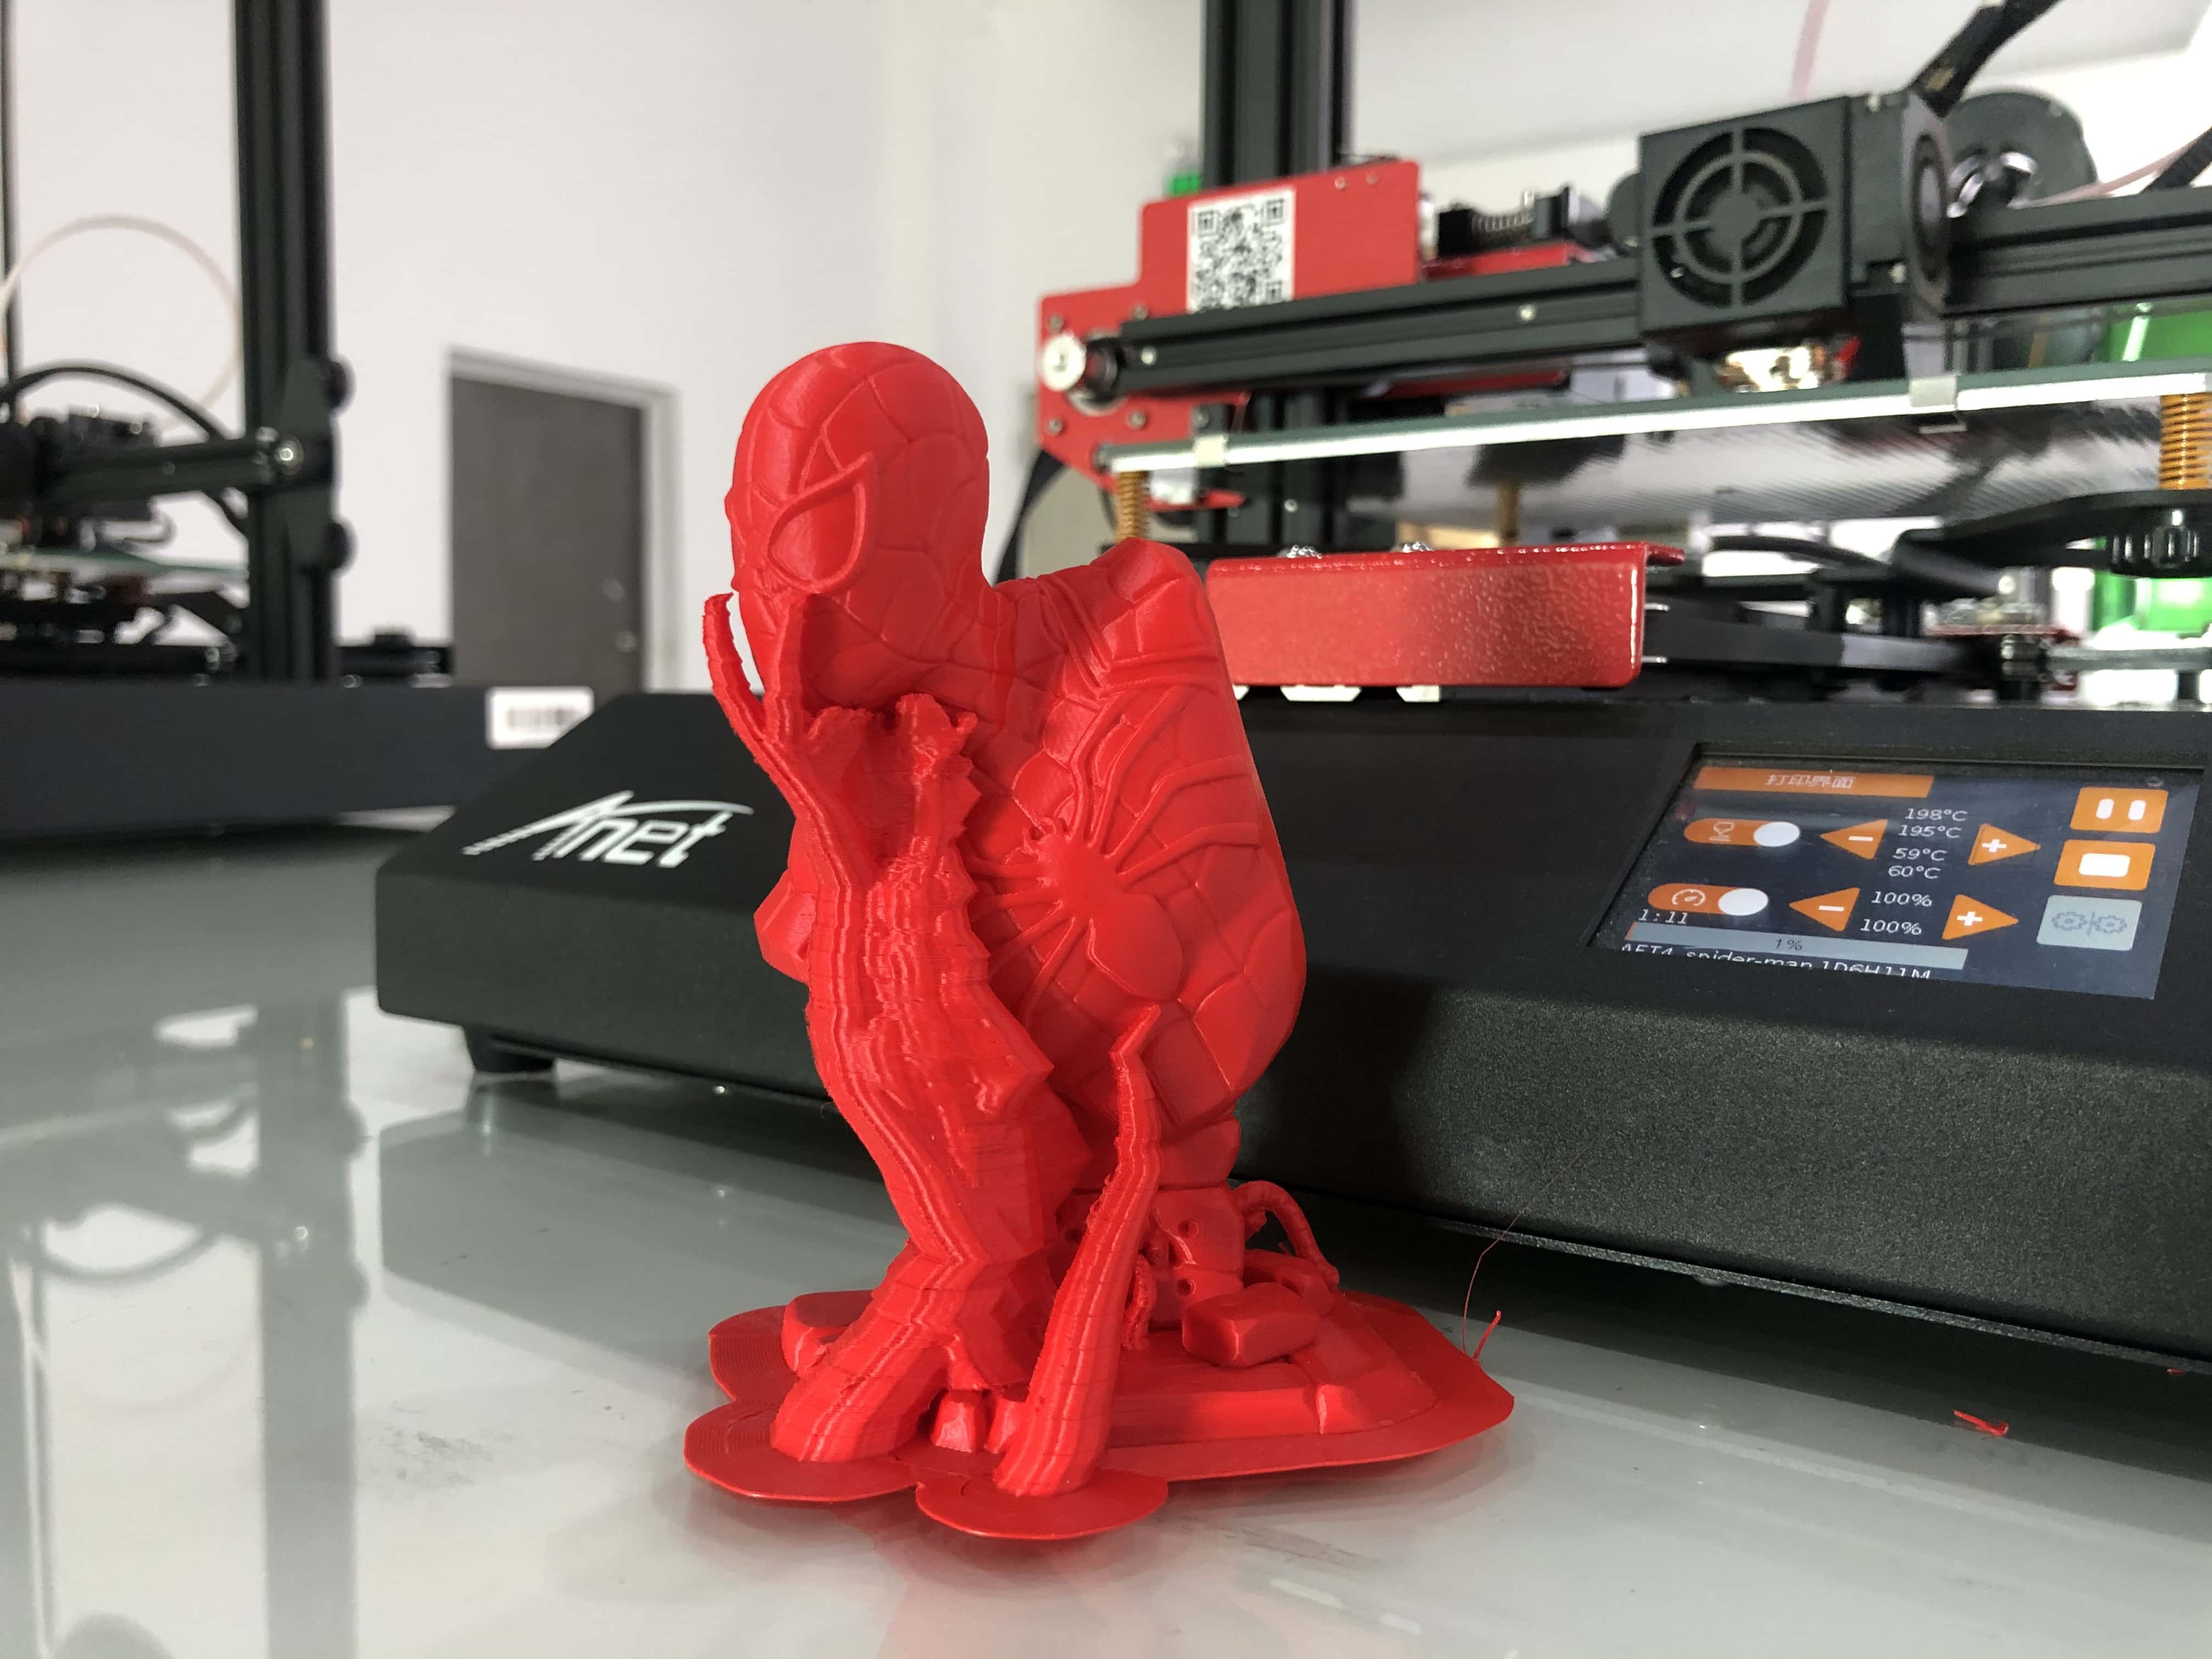
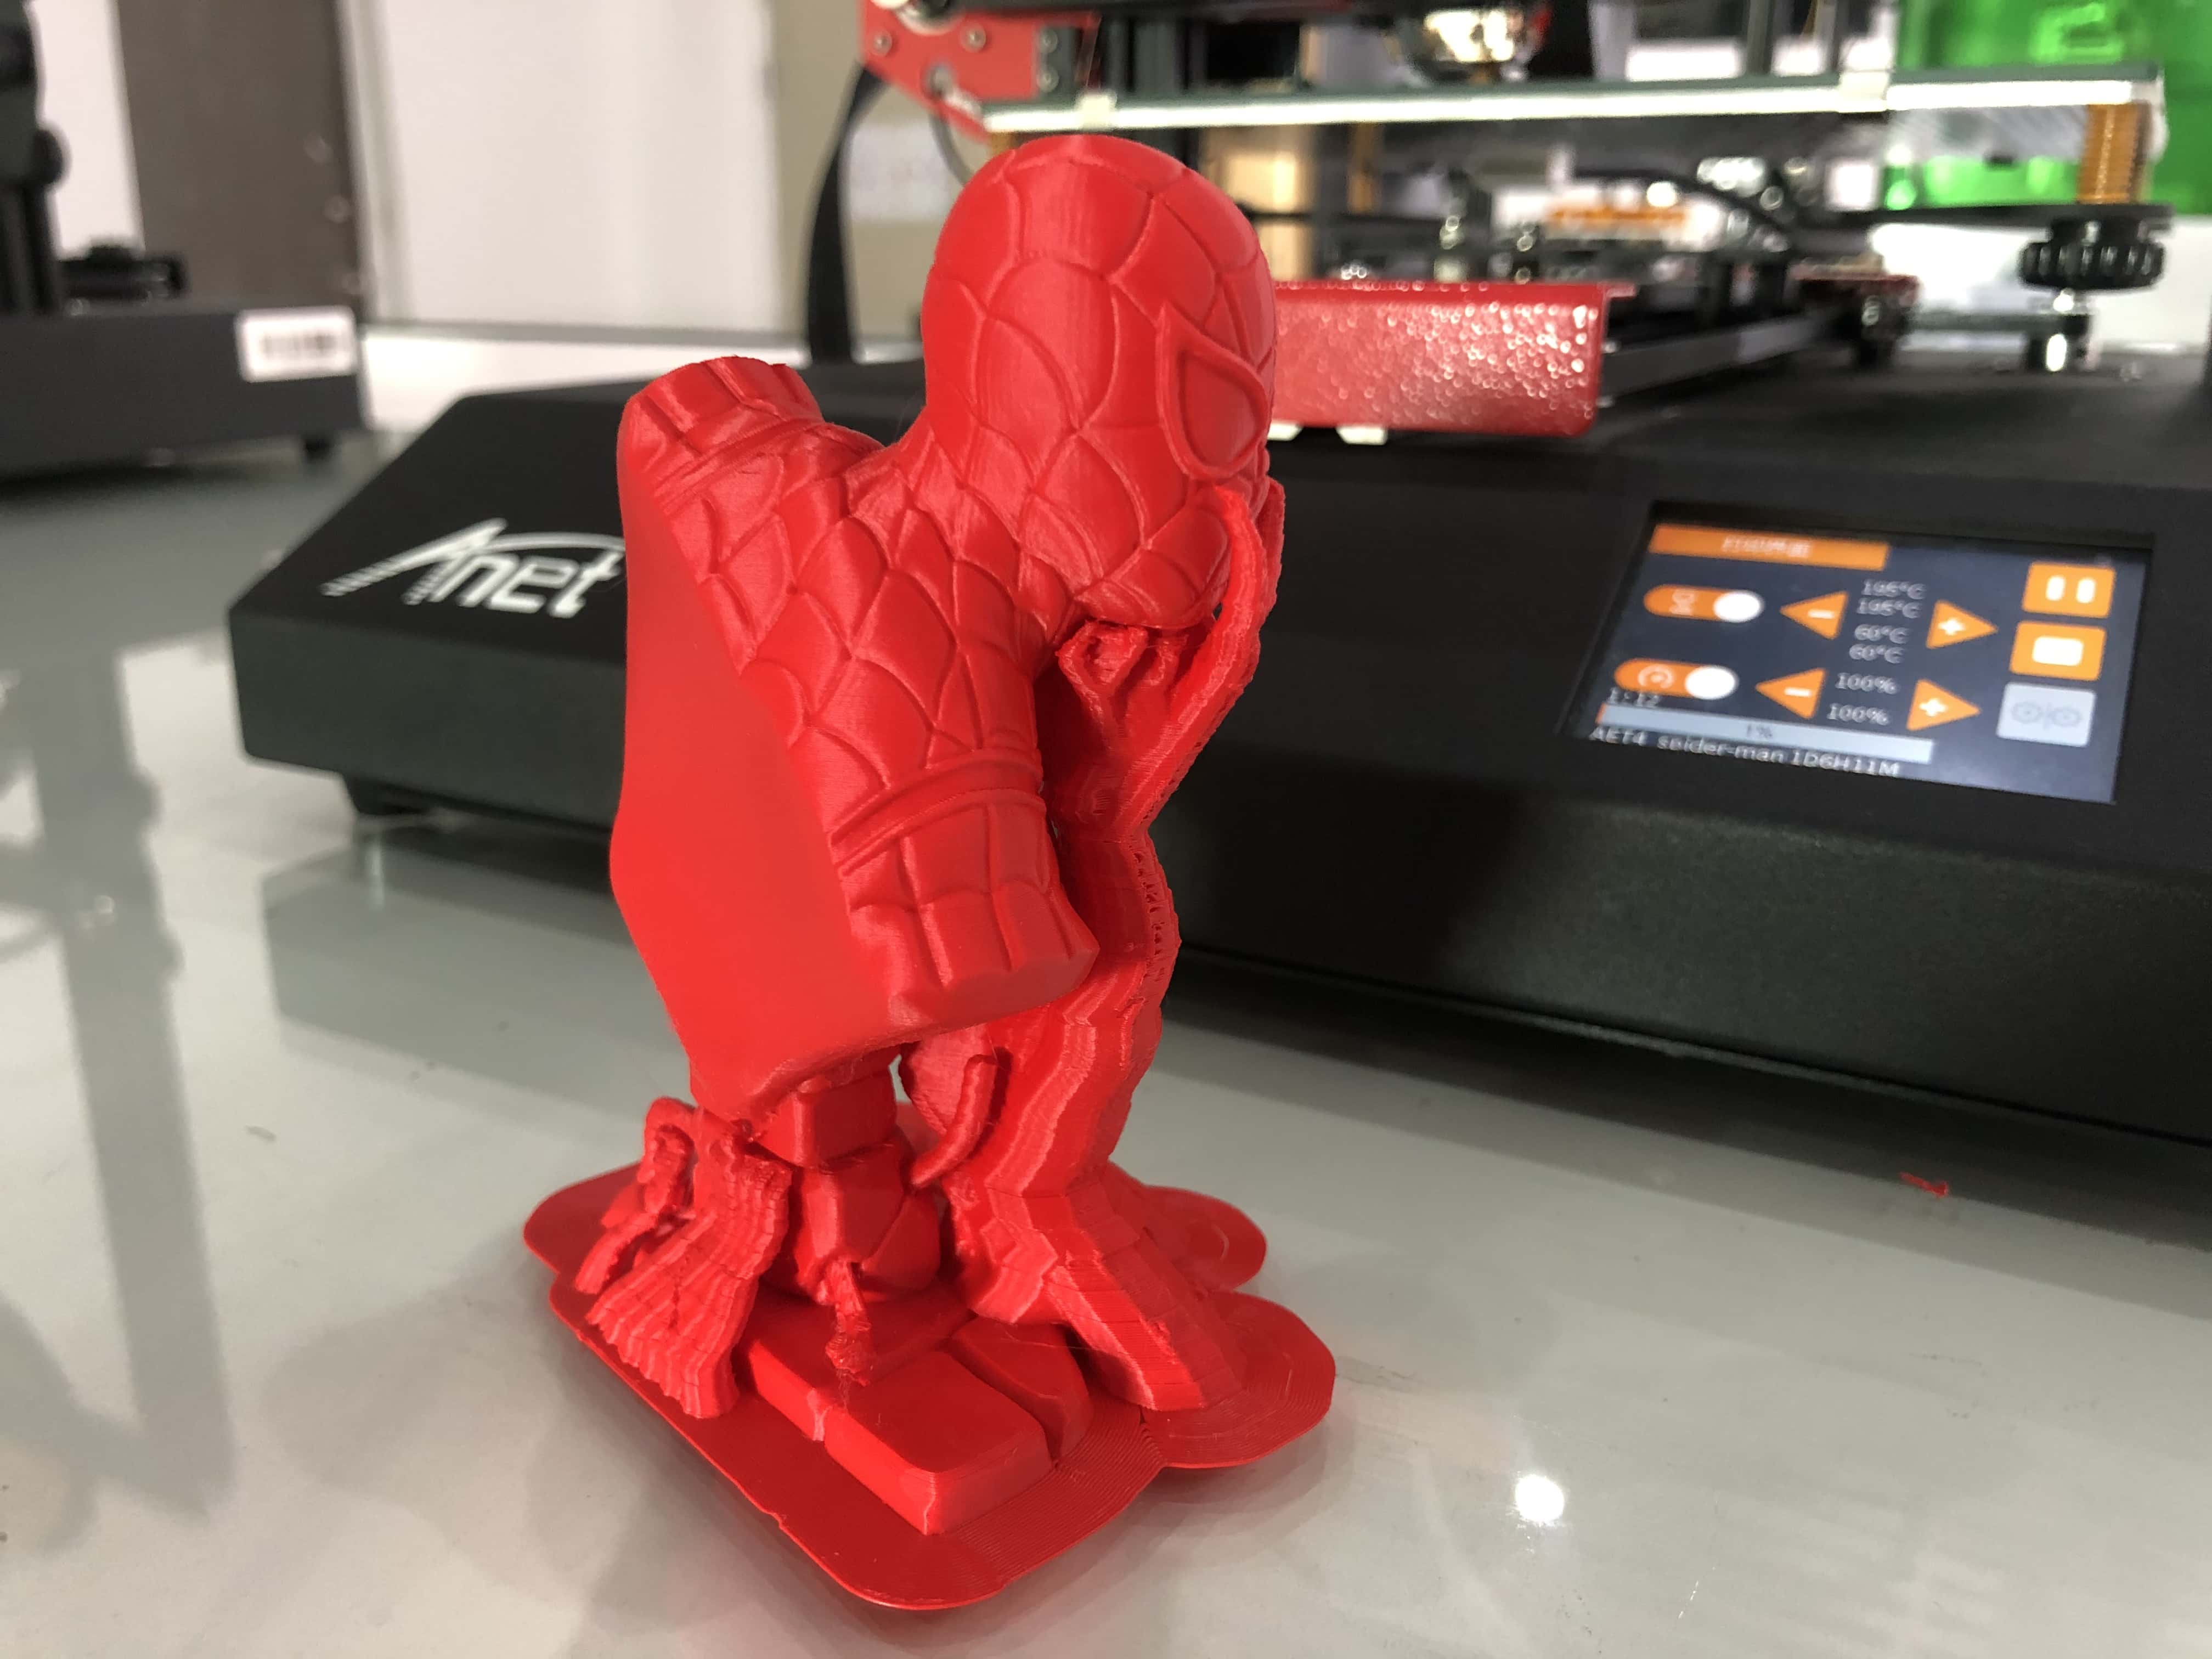
You can see the generated tree support under the chin of the spider man. It’s quite interesting
The Ultimaker Cura 4.7.1 setting for Anet ET4, ET4X and ET4 Pro 3D printers is available on the following link.
If you have any questions, please feel free to leave comments down below, our guys are waiting to help you. Joining our community is also a good idea, you can get information, model files, g-code files, tutorials and find the enthusiasts as you are. It's a place where creative people gathered, just hit the link: https://forum.anet3d.com/
Leave a comment